Summary
Photogrammetry is a technique, which is already around for quite some time, but it’s also some kind of trend that gets used more and more in games recently. One reason for this might be the greater availability of VRAM for bigger textures, but certainly also the trend of creating immersive environments for Virtual Reality.
The term Photogrammetry describes a technique to reconstruct three-dimensional scenes, or objects, from a series of overlapping photographs. As the accurate recreation of real-world objects for games is a quite time-consuming process with a regular modeling & texturing workflow, it’s interesting to see,
What are beneficial use-cases for photogrammetry in a 3D game?
Therefore, this paper is examining the differences between regular modeling & texturing workflow and photogrammetry as an alternative or addition. To examine its influences on the production speed & quality. Furthermore, this paper shows the challenges, which arise while applying photogrammetry, as well as its advantages. It’s not meant as an exhaustive, step-by-step guide to photogrammetric scanning, but rather an introduction and collected set of hints and tips.
The gathered data shows that photogrammetry can offer a delightful addition to a regular asset pipeline if the project requires a certain type of asset, which is ideal for photogrammetry. It offers a valid alternative in situations, where objects with a lot of surface details, like wear & tear, or weathering effects are needed. These types of objects are ideal, as the captured photographs allow an exact recreation of these little influences in a very detailed and realistic manner.
However, when objects are not ideal for capturing, the entire capturing and processing gets way more time-intensive for an artist. As its time consuming to compensate for these problematic material types. This makes photogrammetry less usable for projects, which require a lot of objects with reflective, or transparent parts, due to the increased effort that the creation of certain object types requires.
Therefore, photogrammetry offers a nice addition to the regular modeling workflow, to increase the quality of certain assets. Tough, it’s not advisable to fully replace the manual asset creation, due to the increased effort that the creation of certain object types requires. Its ideal use-cases are projects, which require old objects with a lot of wear & tear and history on their surfaces. These additional surface details are not only looking most impressive with photogrammetry, but also they simplify the scanning process.
Introduction
The gaming industry is quite a rapidly evolving industry, that is always pushing for new technologies. One thing that is already talked about for years, is the so-called “Photorealistic” game, or environment. Although we are closer to it than ever before, with all the stunning cinematic game trailers nowadays and the recent trend in the industry to switch to a “Physically Based Rendering” (Russell, 2016) method, which caused a big step forward in realistic real-time rendering, we are still quite a bit away from a fully photorealistic game.
Nevertheless, there is already a technique, that produces some “real” photorealism in games, admittedly in a different meaning, the so-called “Photogrammetry”. Photogrammetry is already around for quite some time, but it’s some kind of trend that gets used more and more in games recently. Whether it’s to capture the accurate facial likeness of athletes in FIFA (DIMENSIONAL IMAGING LTD, 2016), or to visualize real-world locations as accurately, as possible, like in the VR applications “Realities” (realities.io inc, 2016). Photogrammetry is a technique, that allows converting a bunch of photos of an object, into a textured 3D model. This model includes all the details of the real-world object, like wear and tear and all the influences the world had overtime on the object.
This is precisely, what makes photogrammetry so interesting and useful. It’s not only making a virtual copy of an object in form of a mesh, but furthermore, it also captures the history of the object, in form of scratches, dirt, and all that stuff, which texture artists need a lot of time and experience for, to accurately recreate it.
For this reason, this report is examining what exactly photogrammetry is, which boundaries and benefits it has and in which use-cases it offers a good alternative to the standard way of manually modeling and texturing objects from scratch.
What are beneficial use-cases for photogrammetry in a game?
As usual, there is no perfect or only one way to look at a technique like this, as its usability always depends on the given use case and sometimes, personal preference. But this report is trying to give you a detailed inside into Photogrammetry, to allow you, to build your own opinion about it.
Reason
Photogrammetry is something I am interested in already for quite a while, as I found it always delightful to be able to put real-world objects into a virtual environment.
Since I knew a bit more about the technique and the workflow behind it, it’s something, that I wanted to try out a bit more in-depth on my own, but never had the time for.
Therefore, this “free” time of my study to write this report offers the perfect opportunity for me to look a bit more in detail at Photogrammetry. As Photogrammetry seems to be used more and more in the industry recently and the company, where I was doing my internship is also planning to look into photogrammetry, the topic is more relevant than ever.
The basic requirements to start with photogrammetry are quite simple, you only need a camera and software to convert your captured images into a 3d model and its texture. Though there are always a couple more things to be aware of to get ideal results.
Therefore, I would like to have a look at the general boundaries and benefits of photogrammetry and look at its usability in a few different use cases to be able to conclude, which type of project is suitable. So that I can recommend at the end of my research, how and when photogrammetry can be beneficial to be used in a project.
Preliminary Problem statement
Therefore the following preliminary problem statement was built:
What are efficient use-cases for photogrammetry?
Theoretical framework
The theoretical framework is used to build a foundation for further research done throughout this report. Furthermore, it defines the used terminologies and technologies for the reader to make sure they can follow the further explanations throughout this report.
Definitions
This report is going to look a bit more into detail at Photogrammetry, to conclude for which kind of projects, or use cases, it would be a beneficial alternative to the regular modeling & texturing workflow. This assumes of course, what both terms are standing for in the context of this report. Therefore, before getting started, let's clarify these definitions, to avoid misinterpretation.
What does the term Photogrammetry mean?
The term “Photogrammetry” stands for the technology to reconstruct three-dimensional scenes or objects, from a series of overlapping photographs. It's used throughout this report as a reference to the technique of generating 3D models & textures for games from a series of photographs. This includes the process of taking the images of the object, as well as its processing in photogrammetry software and its optimization for use in a game engine.
What means “a regular modeling & texturing workflow”?
The term "regular modeling & texturing workflow" used in this report stands for the workflow of creating three-dimensional models in a 3D modeling application like 3Ds Max, or Maya (Polycount, PropsModeling - Polycount, 2016) and to texture them afterwards in Photoshop, or Substance (Polycount, PropsTexturing - Polycount, 2015) based on some reference images, or concept art.
General Model Requirements
The number of different model- & object- types is probably as high as the number of projects you can think of. It makes of course a difference if you are going to model a small object like a bucket or try to capture an entire scene like a cathedral. Sometimes your objects will require a proper texture unwrap, but sometimes tile-able textures or shaders will be more beneficial for you.
To handle all these different use cases would of course blow up the scope of this report, therefore we are only going to compare a single type of objects to give a general overview of the boundaries and benefits of photogrammetry. Though I will try to explain the different aspects of photogrammetry, as clear as possible, so it should be transferable to different use-cases and projects as well.
Therefore, this report is mainly focusing on the creation of smaller assets, to dress up a scene for a game. The kind of assets, that 3D-Artists have to create in masses to detail their game environments. These assets should have a game-ready topology and a proper unwrap with PBR-ready textures.
Game-ready means, that their polygon count stays is a reasonable and shape supporting extent, to be still renderable as part as complex environments in a real-time application, like a game. Furthermore, the UV layout should be clean enough to avoid additional draw-calls.
Technique Comparison
Before we can compare both techniques, let's first have look at some example workflows for both techniques and what general advantages & disadvantages they have.
Regular Modeling & Texturing
Most 3D models for games are created manually (or with the help of some scripts & tools) in a specialized 3D modeling software like 3Ds Max, or Maya. Afterward, they get textured again by hand in a texturing suite like Substance, or Photoshop. This requires of course a lot of manual work for an artist and also a lot of experience if the objects should have some realistic aging and wear & tear.
Example workflow:
An example workflow for this technique would be that;
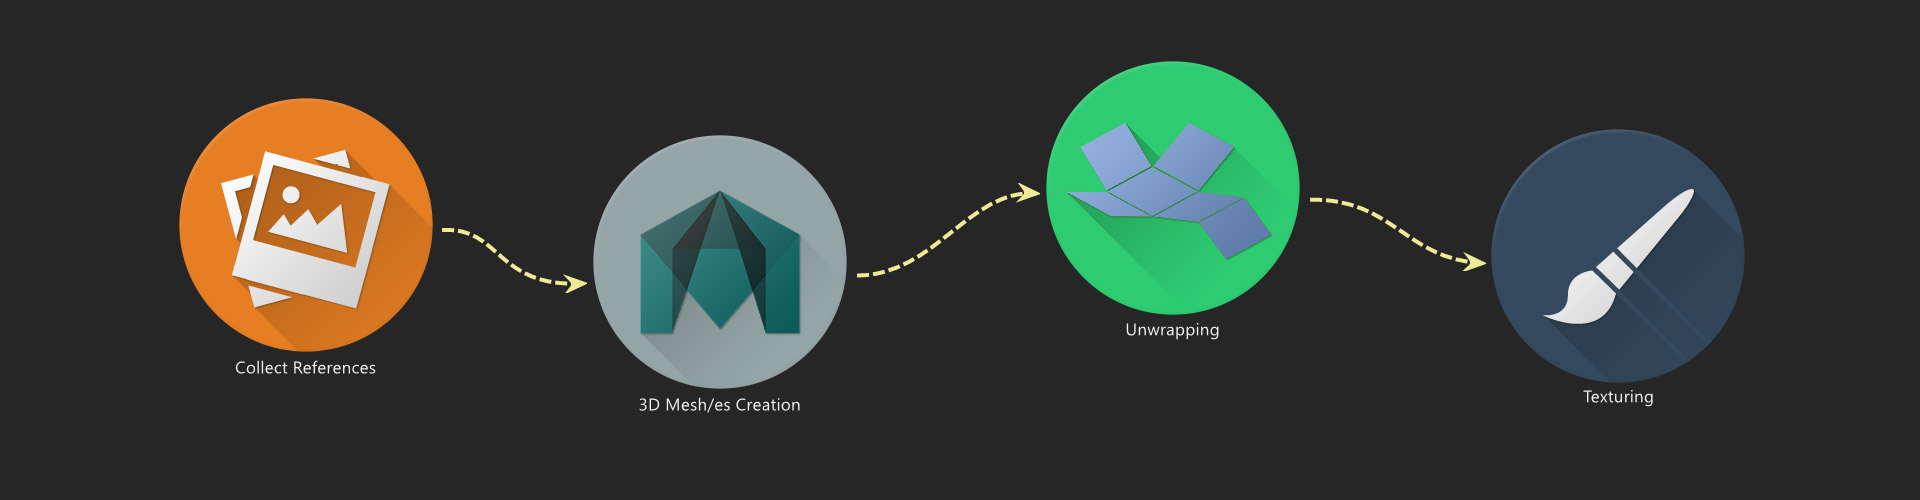
Somebody has to create or search reference photos of the object, which should be created.
An artist builds the 3D model in his modeling application of choice, based on the reference images.
The model has to be unwrapped by the artist.
Afterward, the model has to be textured in a separate application again, based on the provided reference images.
That’s a rather simplified overview about the different creation steps without consideration of additional requirements as collision models etc. just to give an overview about the steps, which are interesting for our comparison.
Advantages & Disadvantages
Pros:
Most 3D Artists know this technique.
It does not necessarily require additional hardware, or space to capture images of the objects, as enough images of most objects can be found on the internet as well.
It works with all kinds of objects.
Fictive objects can be created based on concept art.
Cons:
Requires a lot of manual work.
Requires a lot of skill for texture creation to not look too artificial.
Photogrammetry
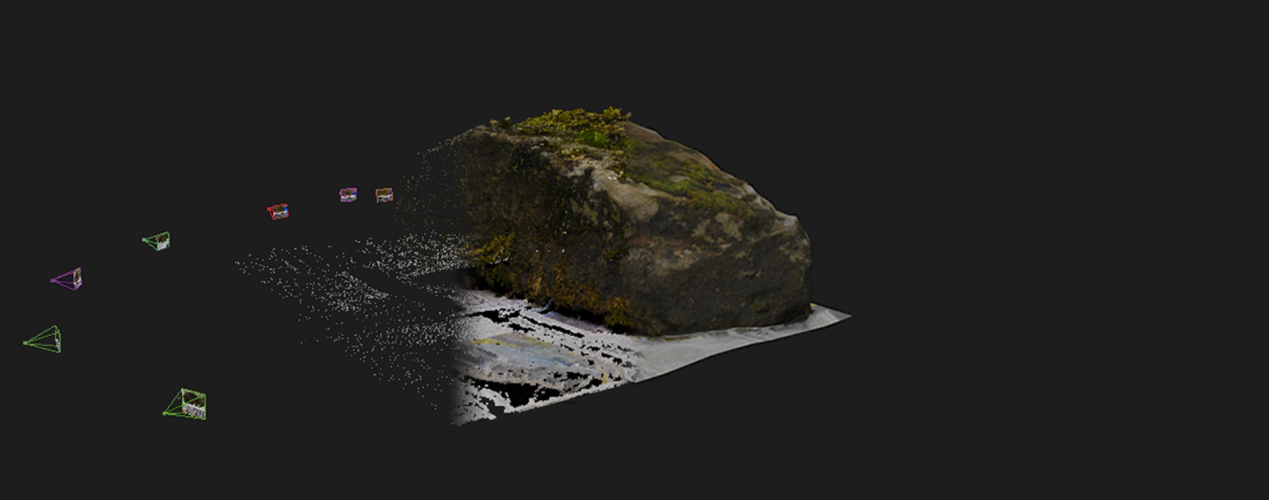
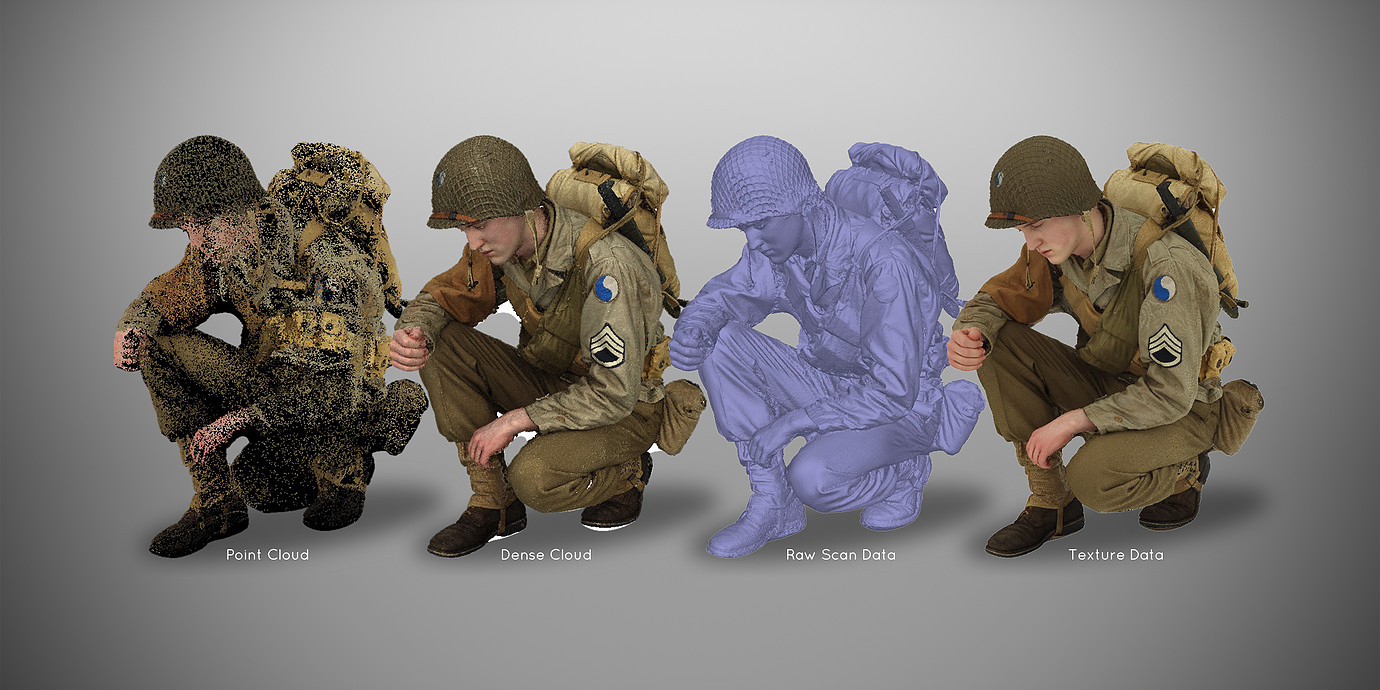
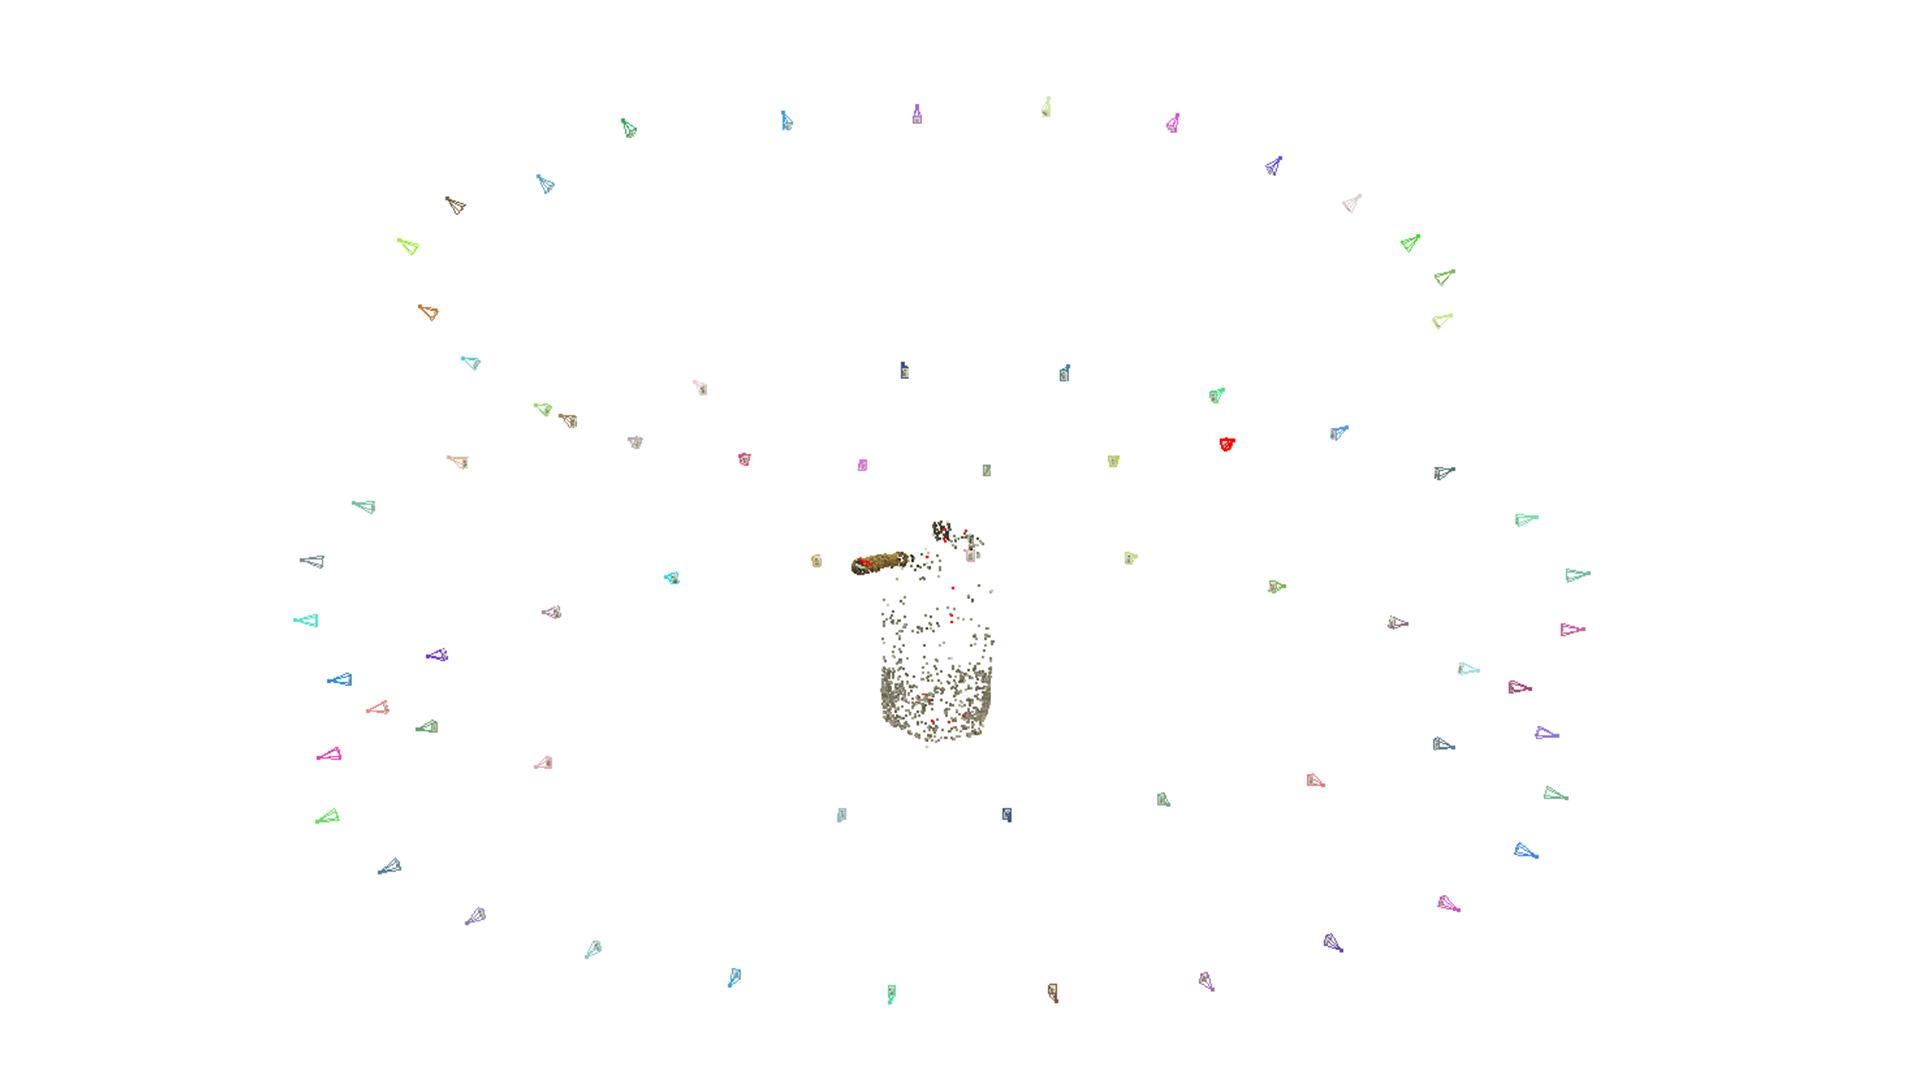
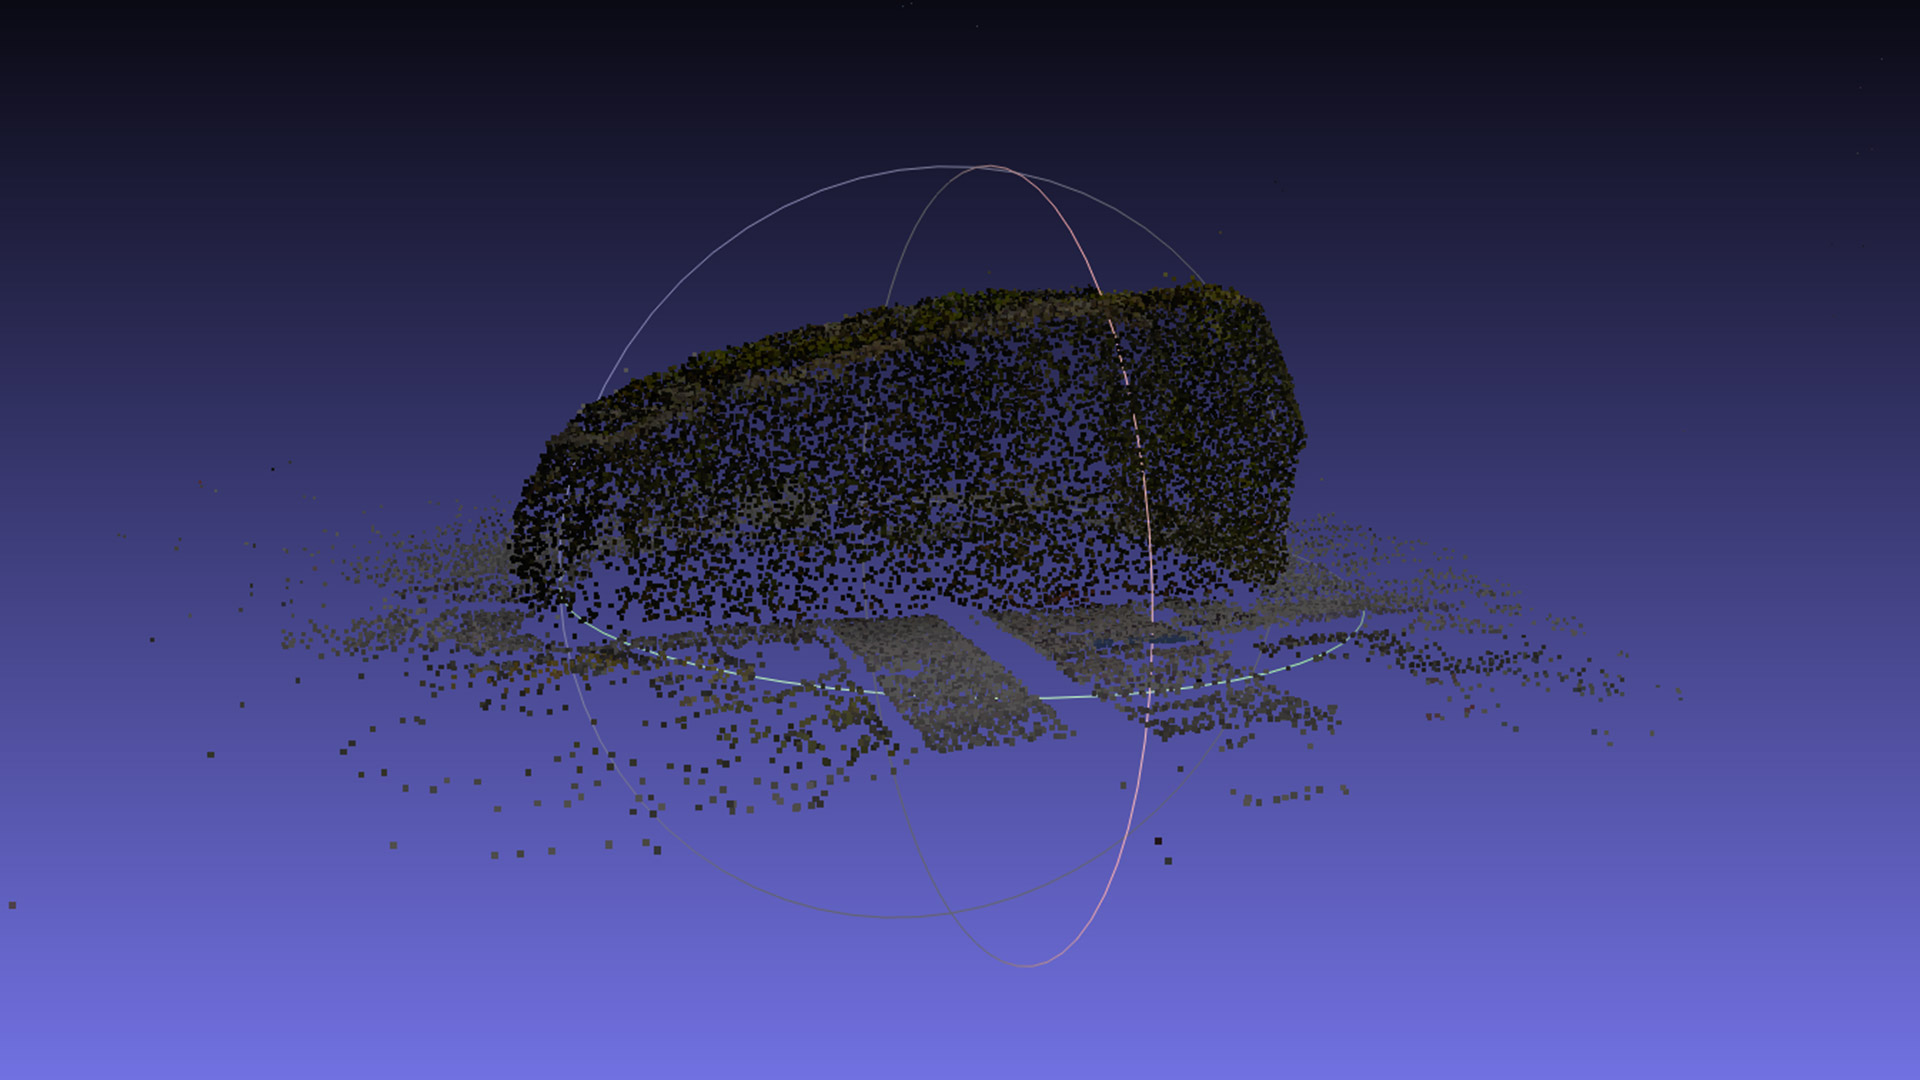
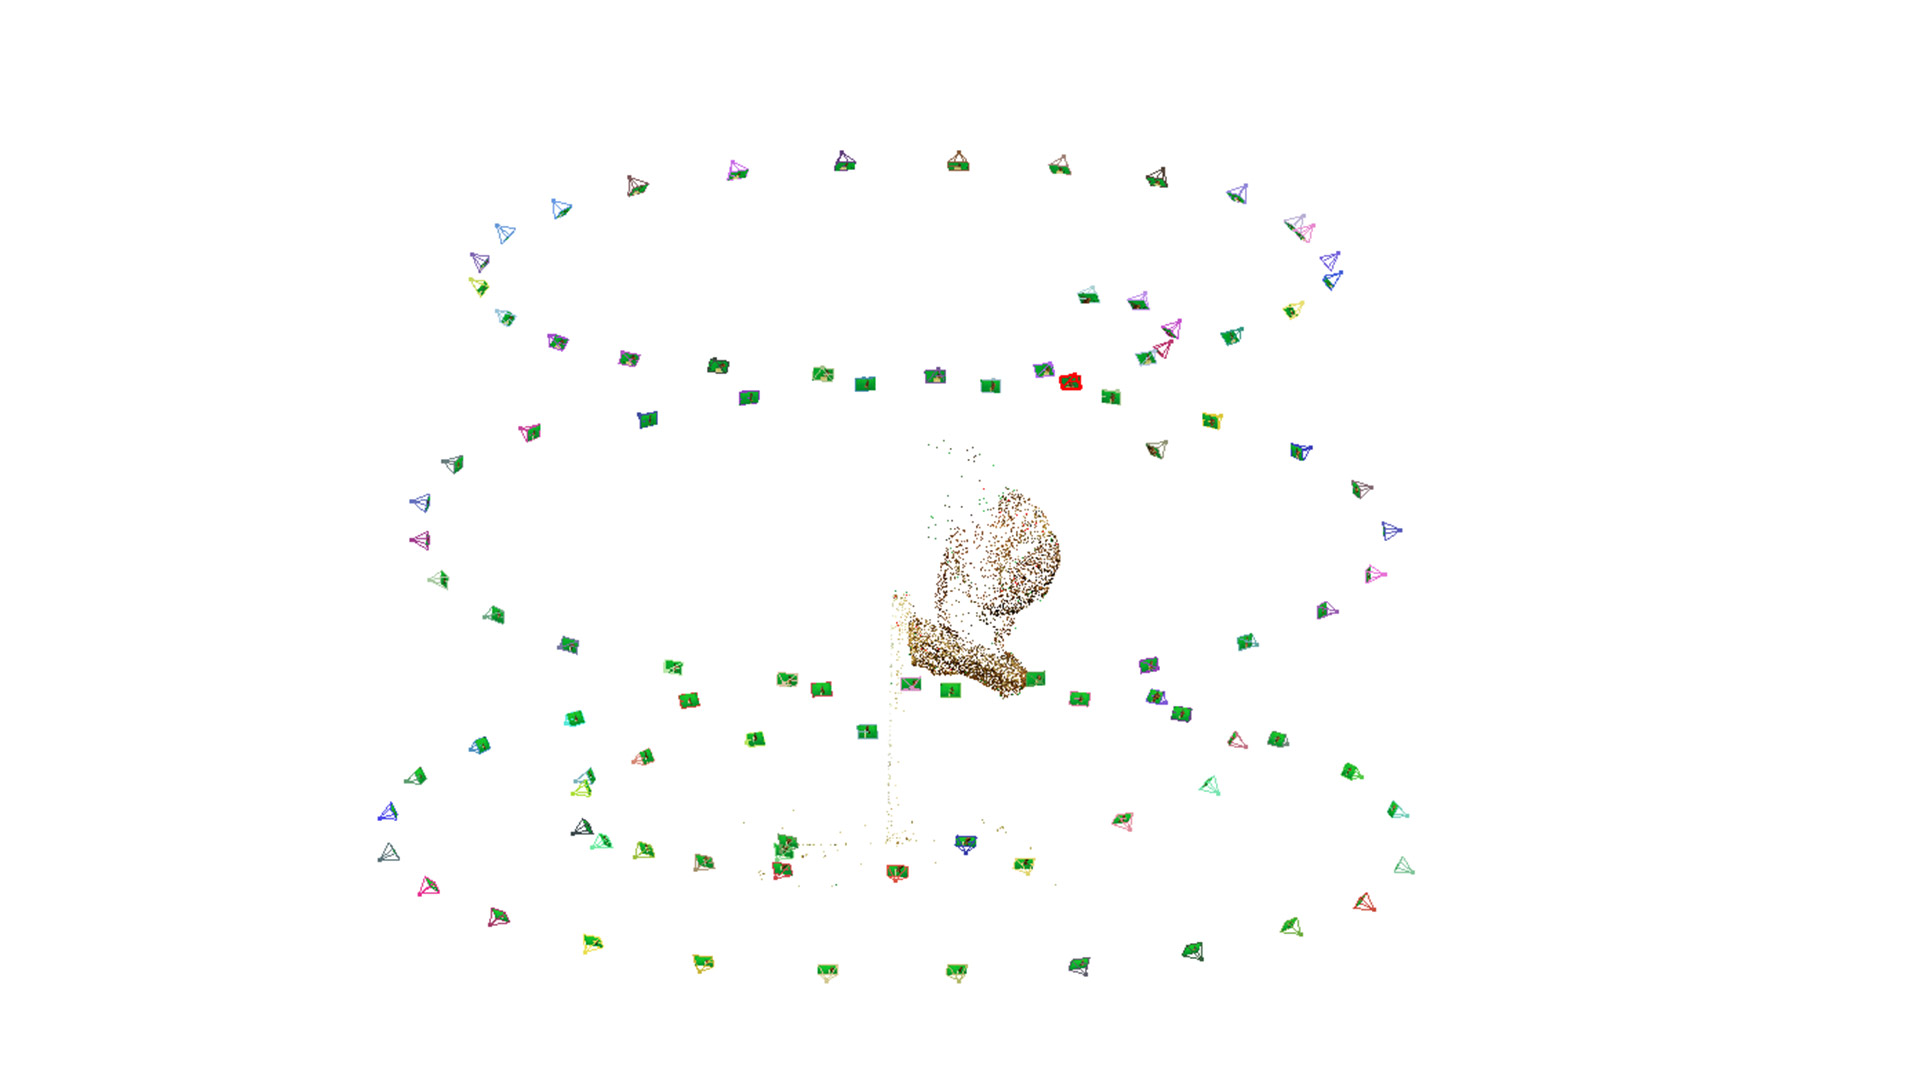
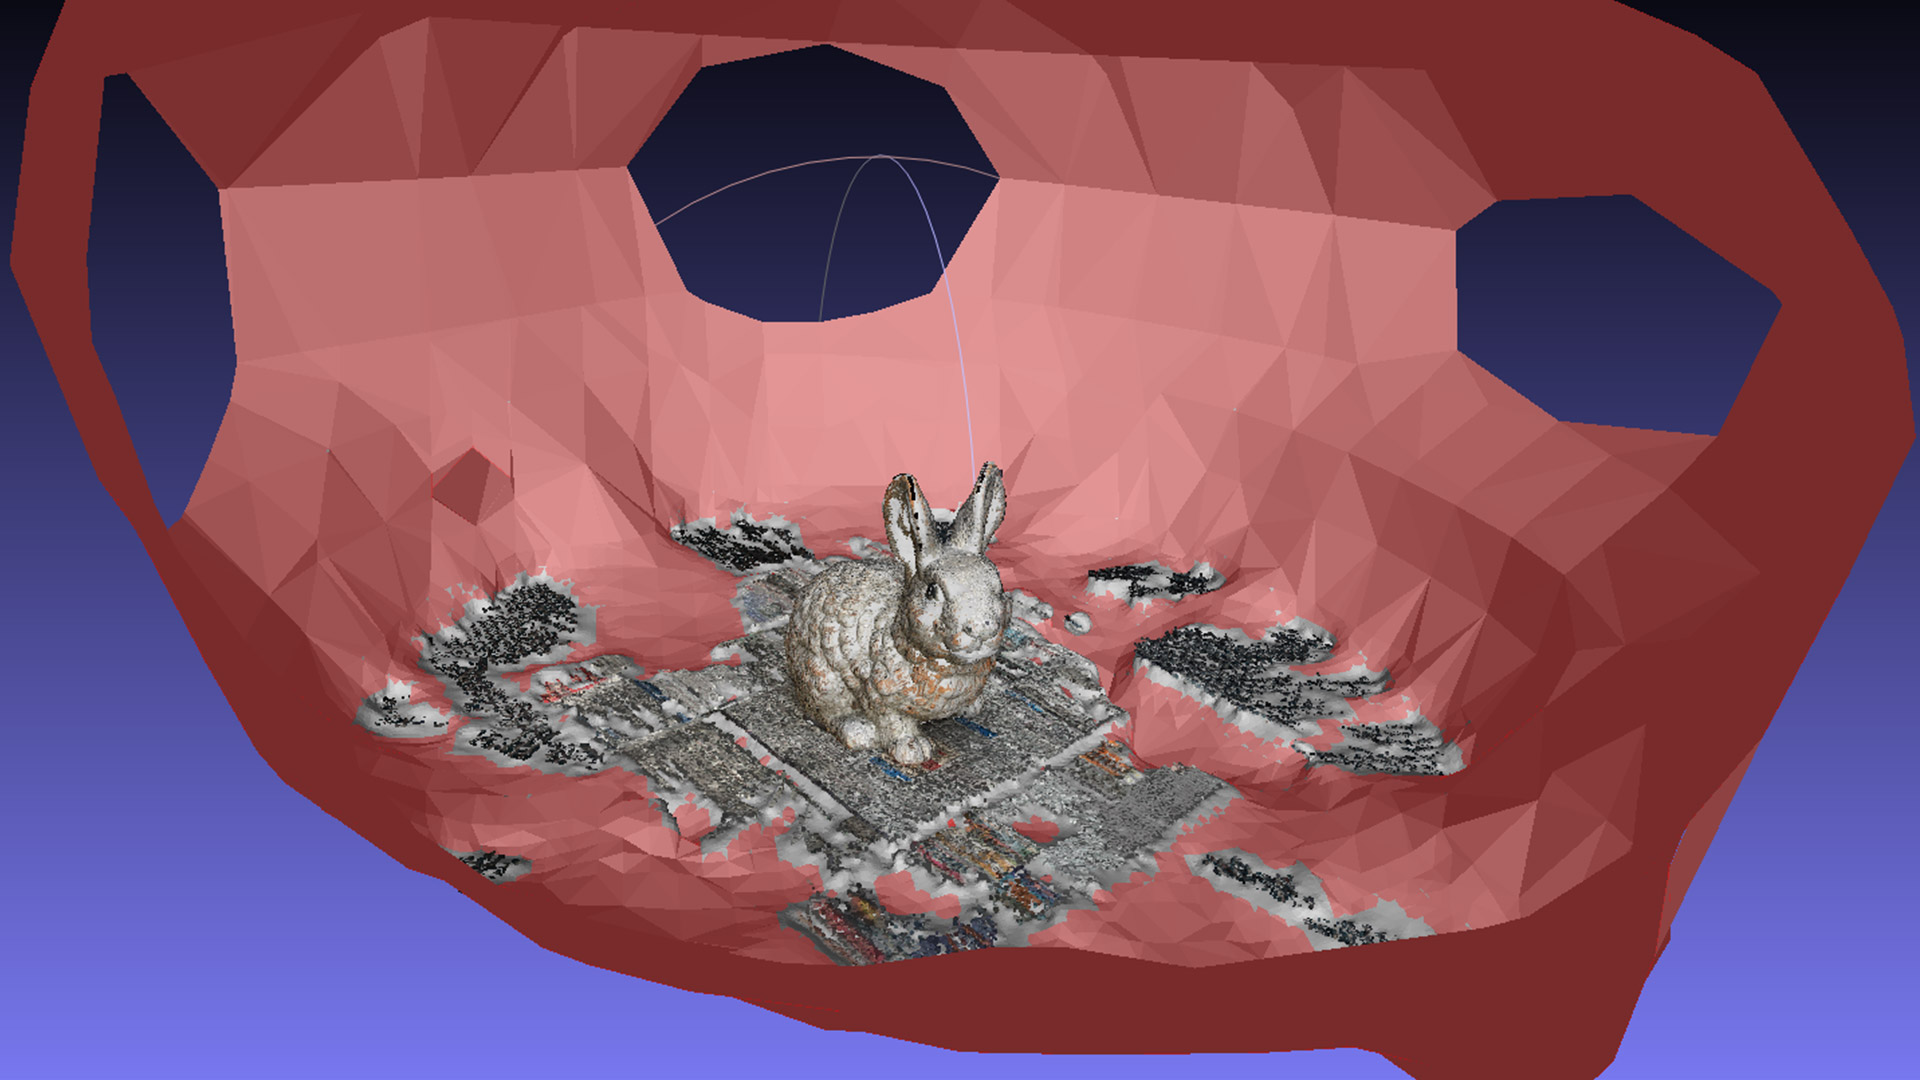
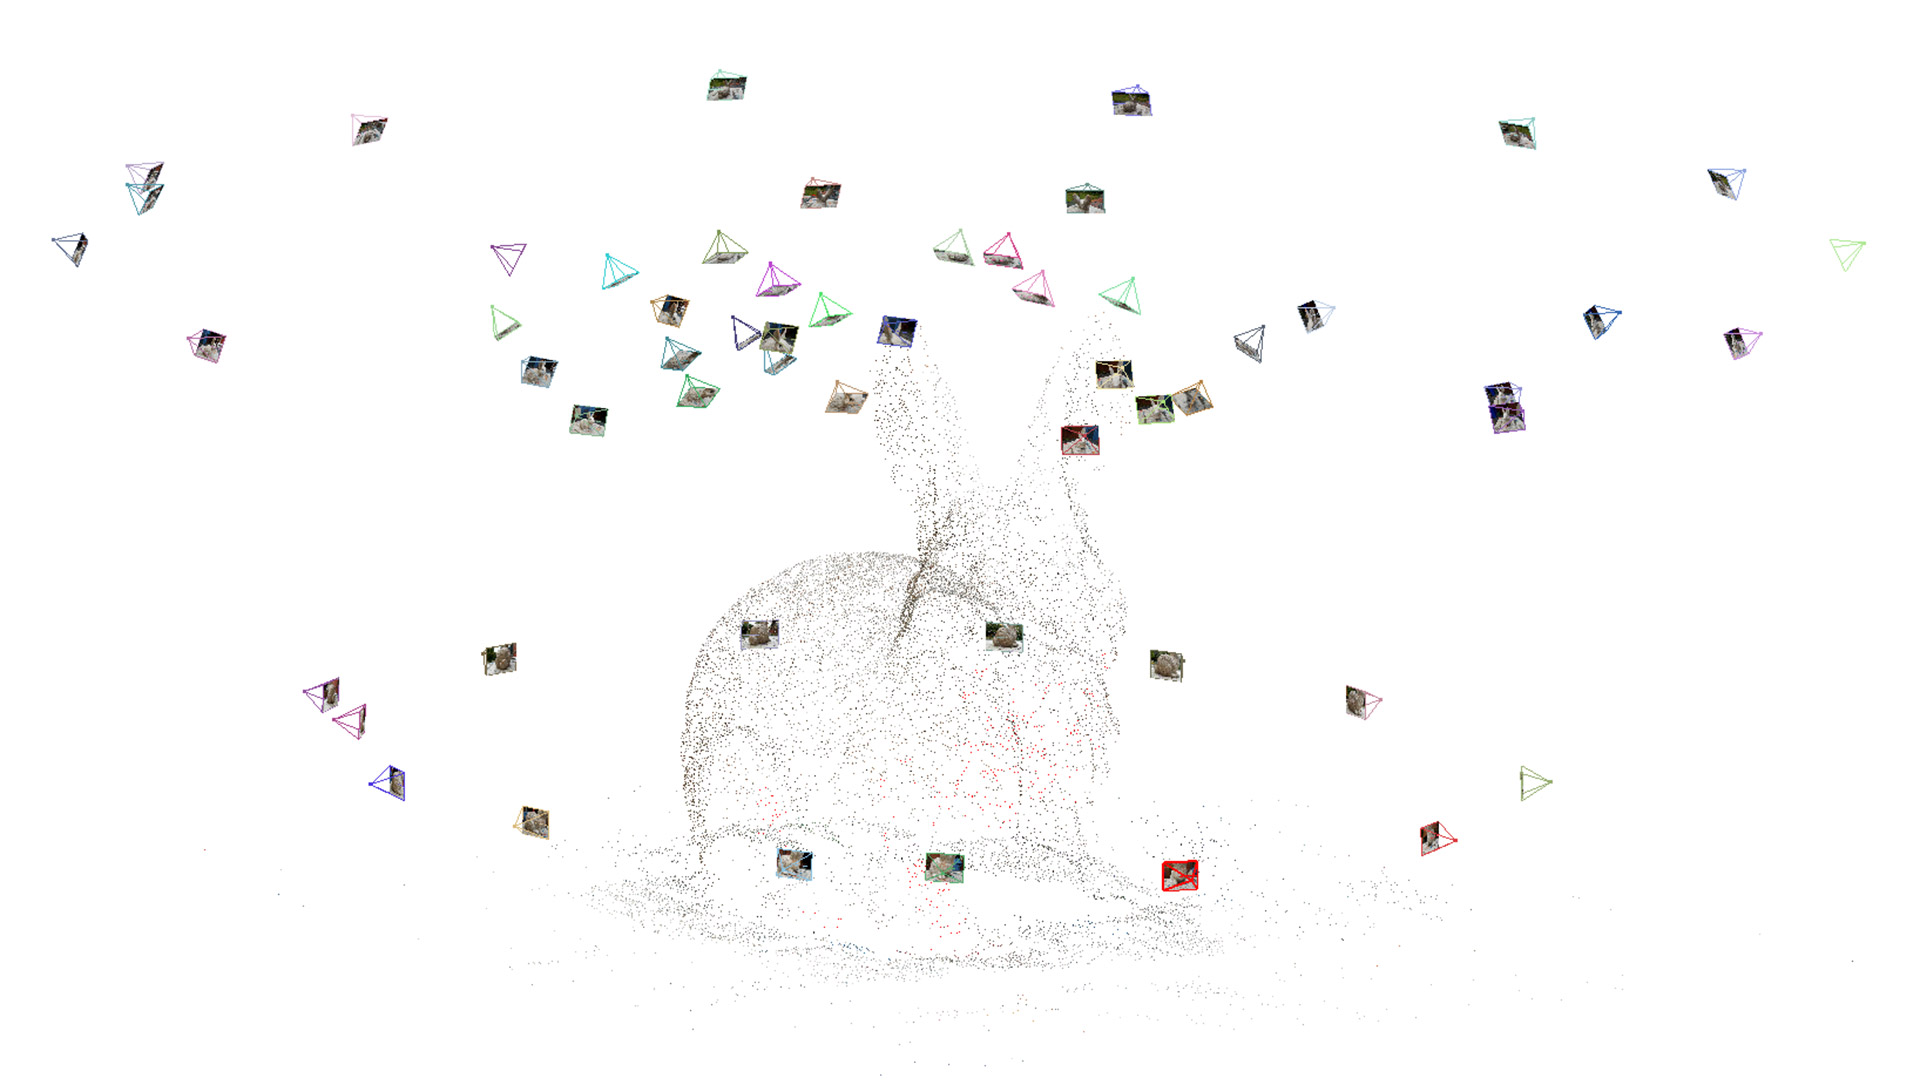
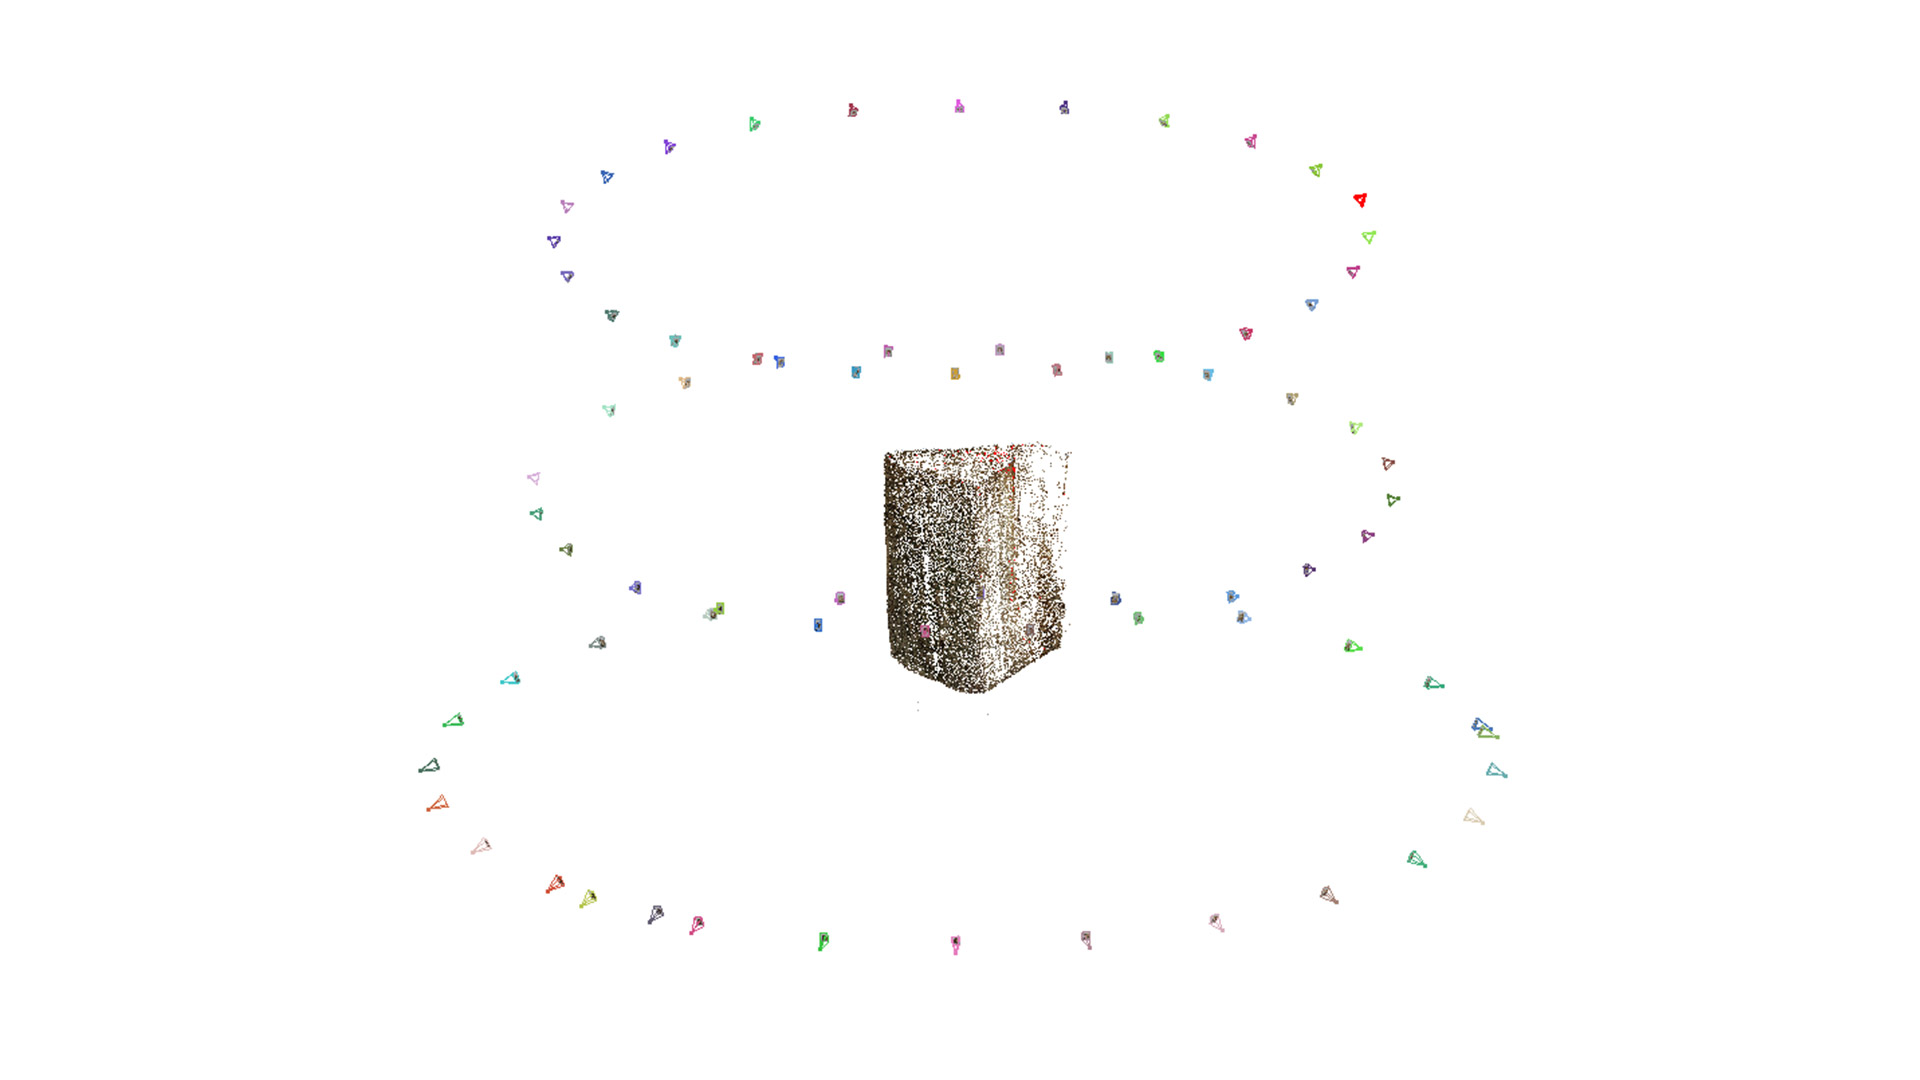
For this technique, a series of photos will be taken from different angles of a real-world object. These photos will then be transformed into a point cloud by special software, to be able to generate 3D models and textures from the images.
Example workflow:
An example workflow for this technique would be that;
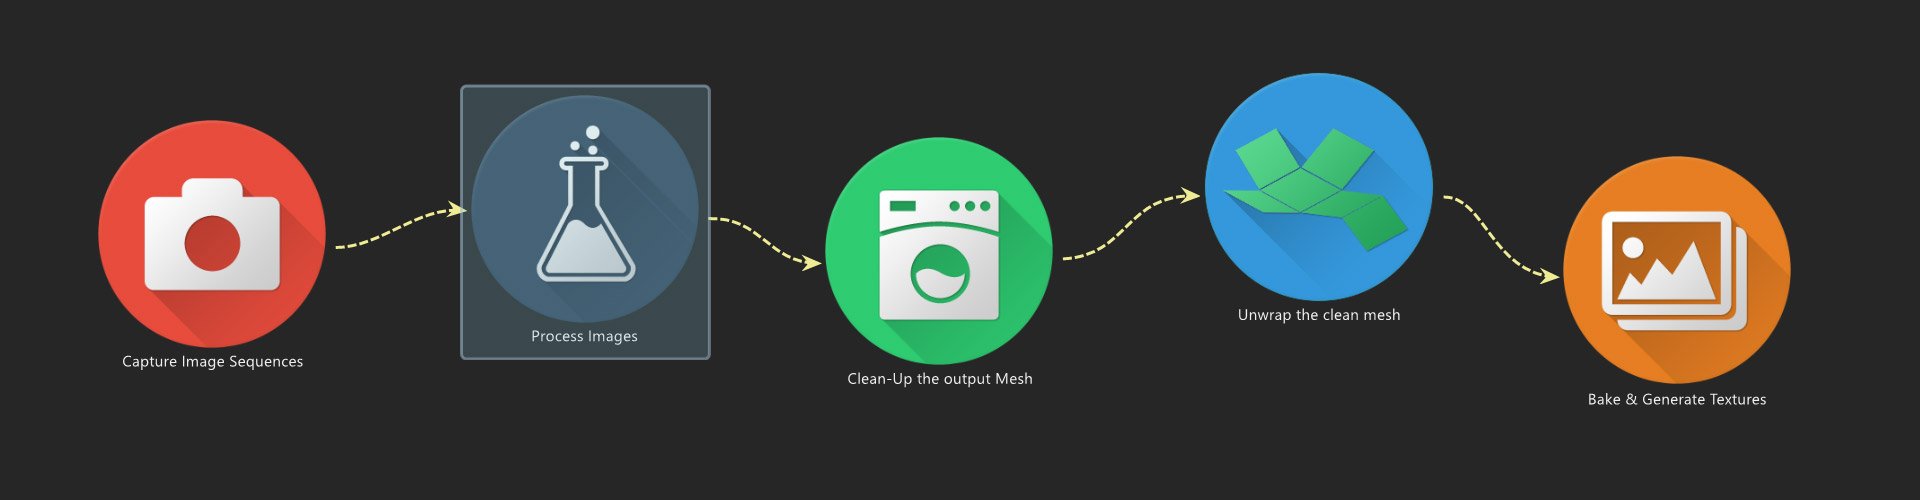
An artist captures a series of photographs of the object.
The photographs are taken into a photogrammetry software.
The output model of the Photogrammetry software gets re-topologized by a 3D Artist.
Afterward, texture maps from the Photogrammetry Software can be baked down onto the re-topologized model.
Additional texture maps, like roughness and metalness, have to be generated by a texture artist, based on the diffuse texture, with software like Bitmap2Material.
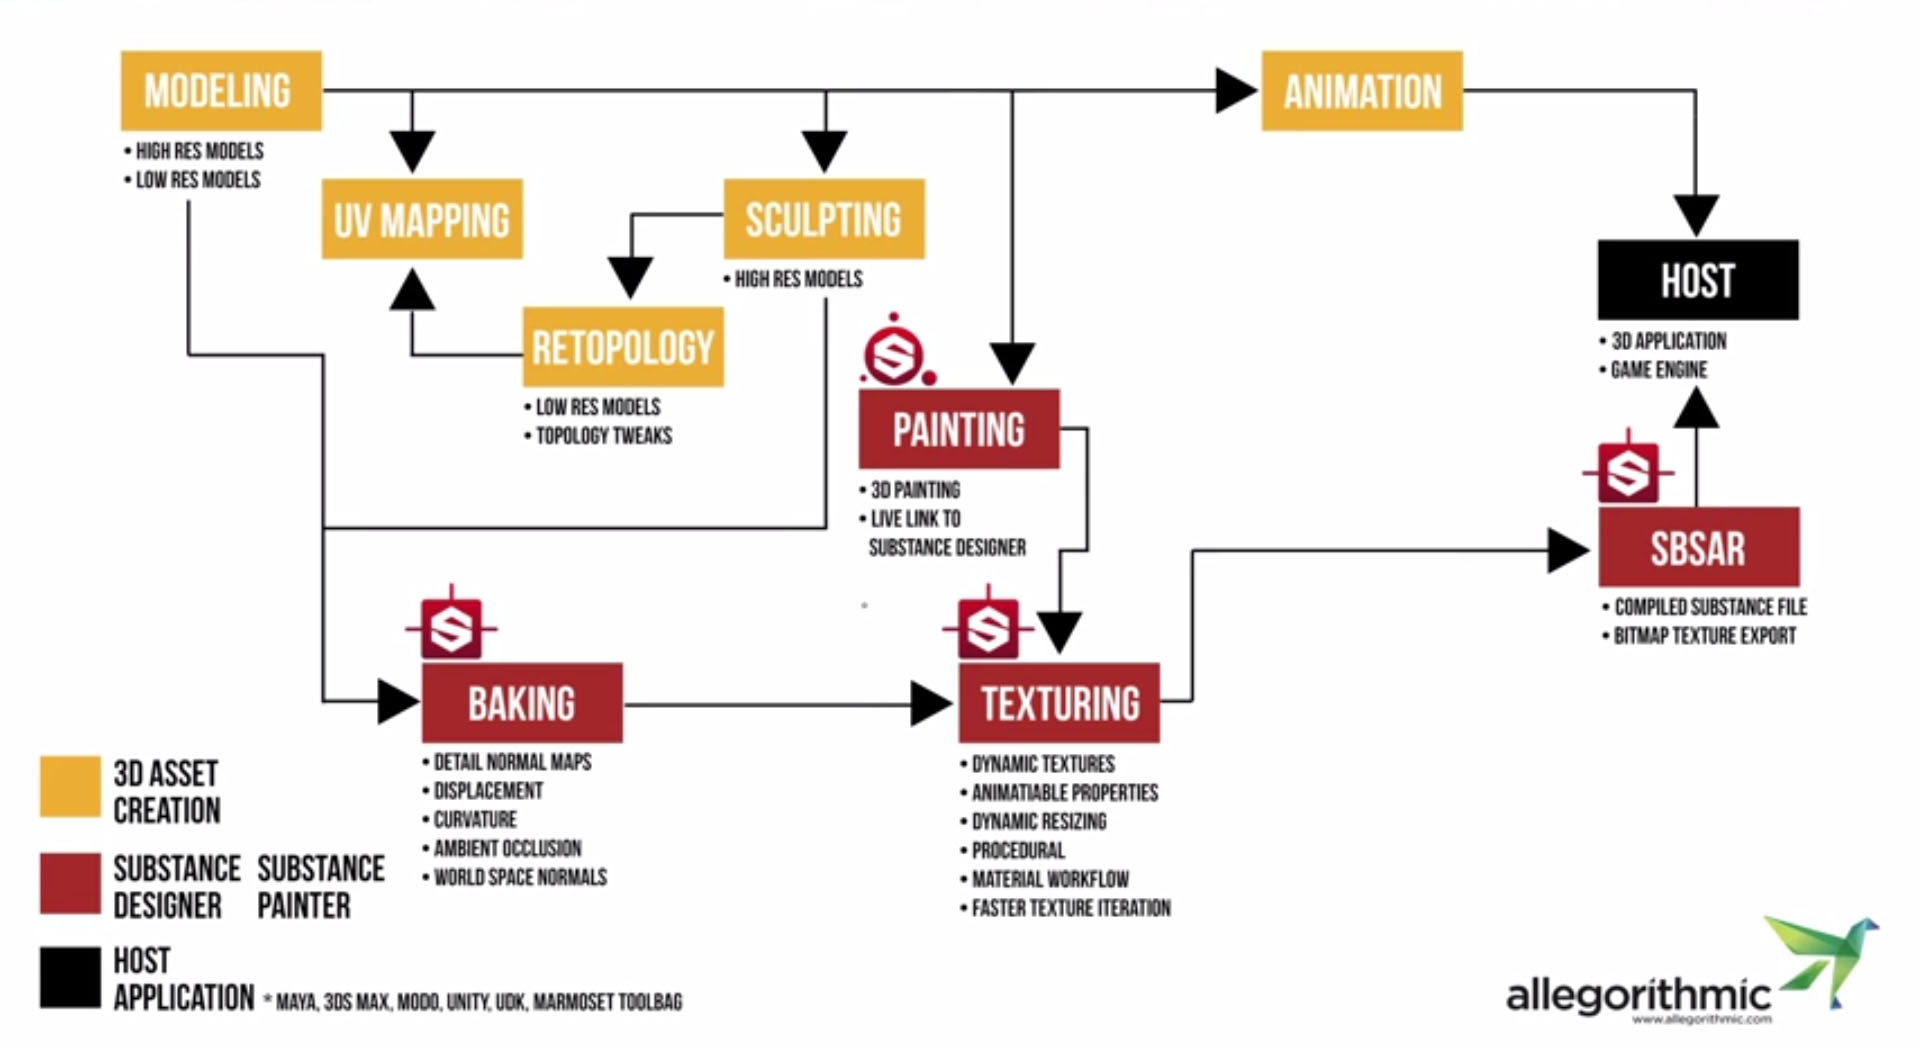
On the first look, photogrammetry requires more steps in the creation process of a game-ready model. However, some of these steps are pretty much automated, so that artists don’t have to do too much manual work in the end. (For more details see Research and Design)
Advantages & Disadvantages
Pros:
Can be automated to a certain extend.
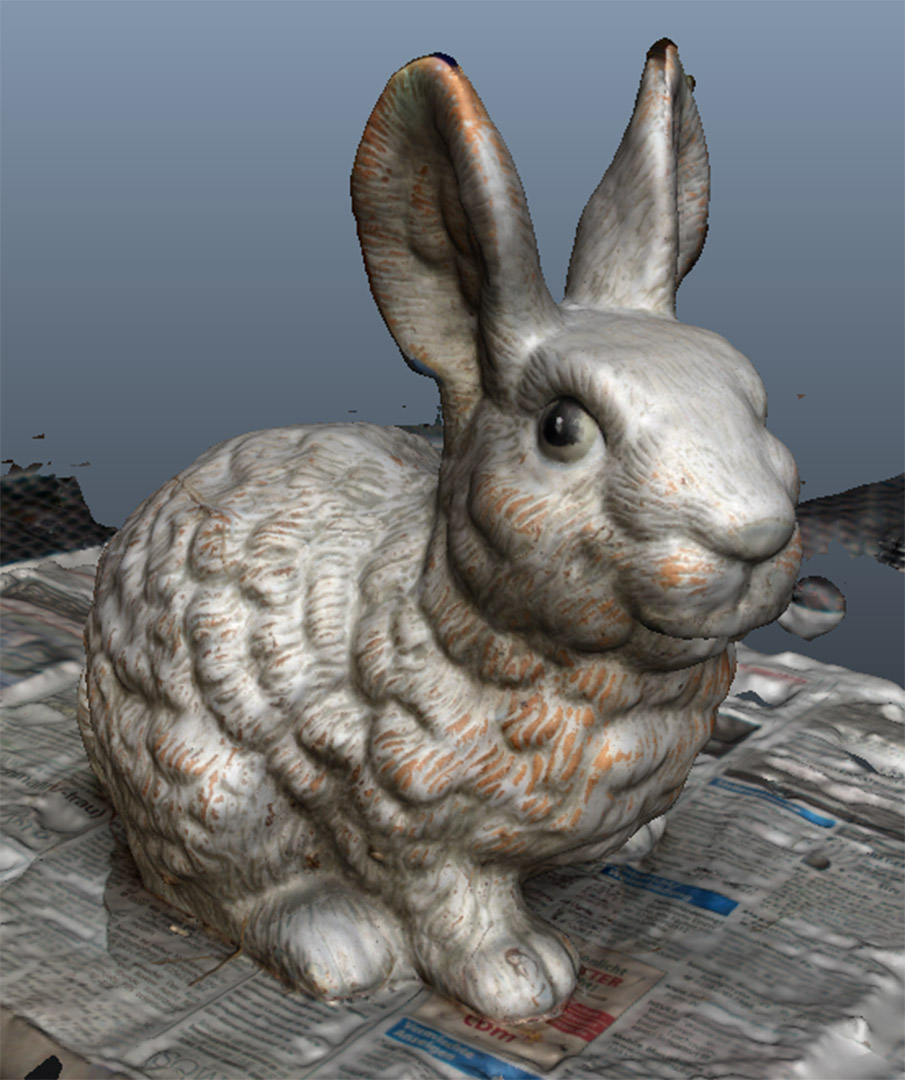
Generates accurate and realistic-looking models with real-world aging and wear & tear.
Cons:
Not every 3D artist has experience with this technique
It requires additional equipment like Cameras & sufficient Capture space.
Not every object is scan able, like transparent or strong reflecting objects.
You need the real-world object at hand.
Overview of Software
There are a couple of applications out there (wikipedia, 2016) to convert photographs into 3D Models, as usual, each with its own advantages and disadvantages.
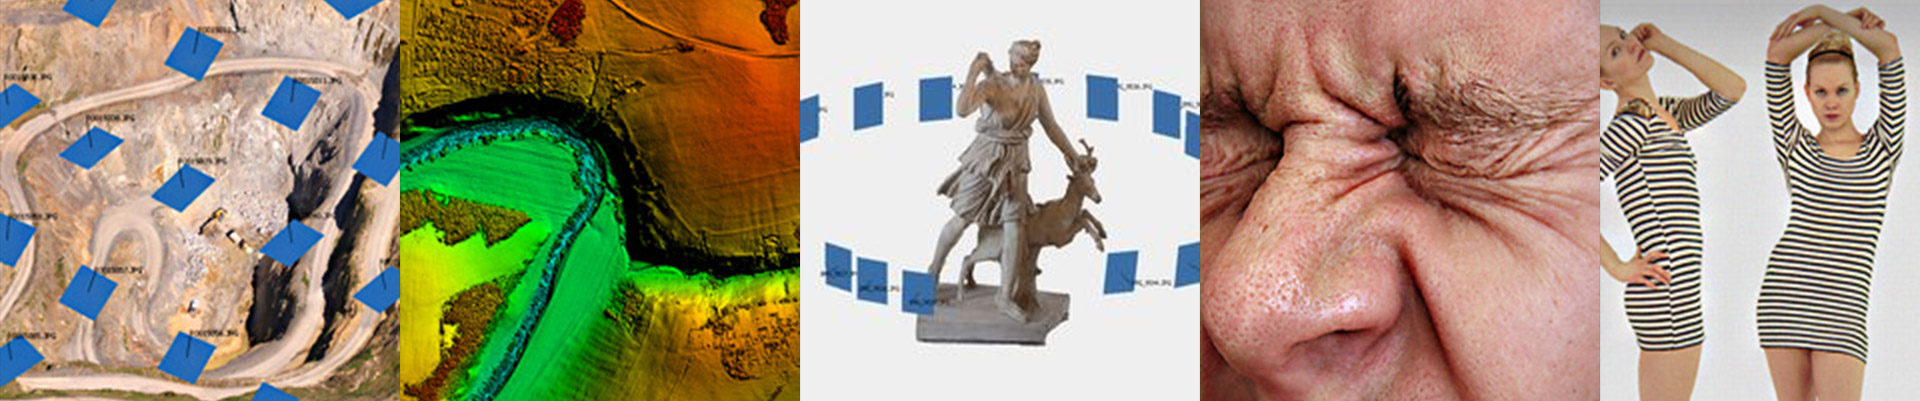
These applications are reaching from specialized software to convert images from drones (UAVs) into meshes of entire landscapes, to software that aims at capturing facial expressions of real-world characters as detailed as possible.
As this report is only explaining photogrammetry in general and not its use in a specific software I won’t talk in detail about all the different software solutions, which are out there, but I would like to give you some insights from my research, so you can decide what’s worth looking into for you.
The probably most used Photogrammetry Software out there for Game Development is AgiSoft Photoscan, which was used in games like “The Vanishing of Ethan Carter” (Poznanski, 2014) who did a phenomenal job. Photoscan offers an all-in-one solution to convert your images into 3D Meshes and textures in one go (except the re-topologizing ofc.), its relatively easy to use and offers an affordable small version, with enough features to start your photogrammetry project.
Another commonly used software is 123Catch from Autodesk, which performs all the heavy calculations in the cloud. It's available in a free version as an app for your phone and pc, therefore it’s nice to gain some first insights into photogrammetry (Autodesk, 2016). Grab your Mobile phone and an object and fiddle a bit around with it. Although it’s nice to play around with the principle of photogrammetry it’s not useable for game production, due to the limitations Autodesk gives you on the amount and resolution of used photographs. So if this report raised your interest in photogrammetry, give it a try, but don’t expect perfect results.
A bit more complicated but more adaptable and free software is VisualSFM. With it alone, you won’t come far, as it's just handling one part of the pipeline (Wu, 2016). In combination with this, you will need a dense reconstruction tool like PMVS/CMVS and software like “MeshLab” to process their output mesh in the end (you still need to re-topologize and bake this output to get a proper model). A good tutorial for using this bundle can be found here.
Although this setup might sound way more complex, than the use of AgiSoft (in fact it is), it also offers some very nice advantages. Its relatively modular, as things like the dense reconstruction tools it uses, can be simply swapped out and in addition to that, it also offers a command-line option as well as versions for Windows, Linux, and Mac OSX.
That was the main reason why I looked more in-depth into this software “bundle”. I like to automate as much repetitive work as possible, with closed source software that can be tricky sometimes. Furthermore, photogrammetry is quite a computation extensive, therefore my work machine is unusable for a few minutes every time I start to calculate some meshes.
The command-line options and multi-OS support of VisualSFM allow building a custom render farm, by simply splitting parts of the process across different machines in the office.
Hardware Requirements
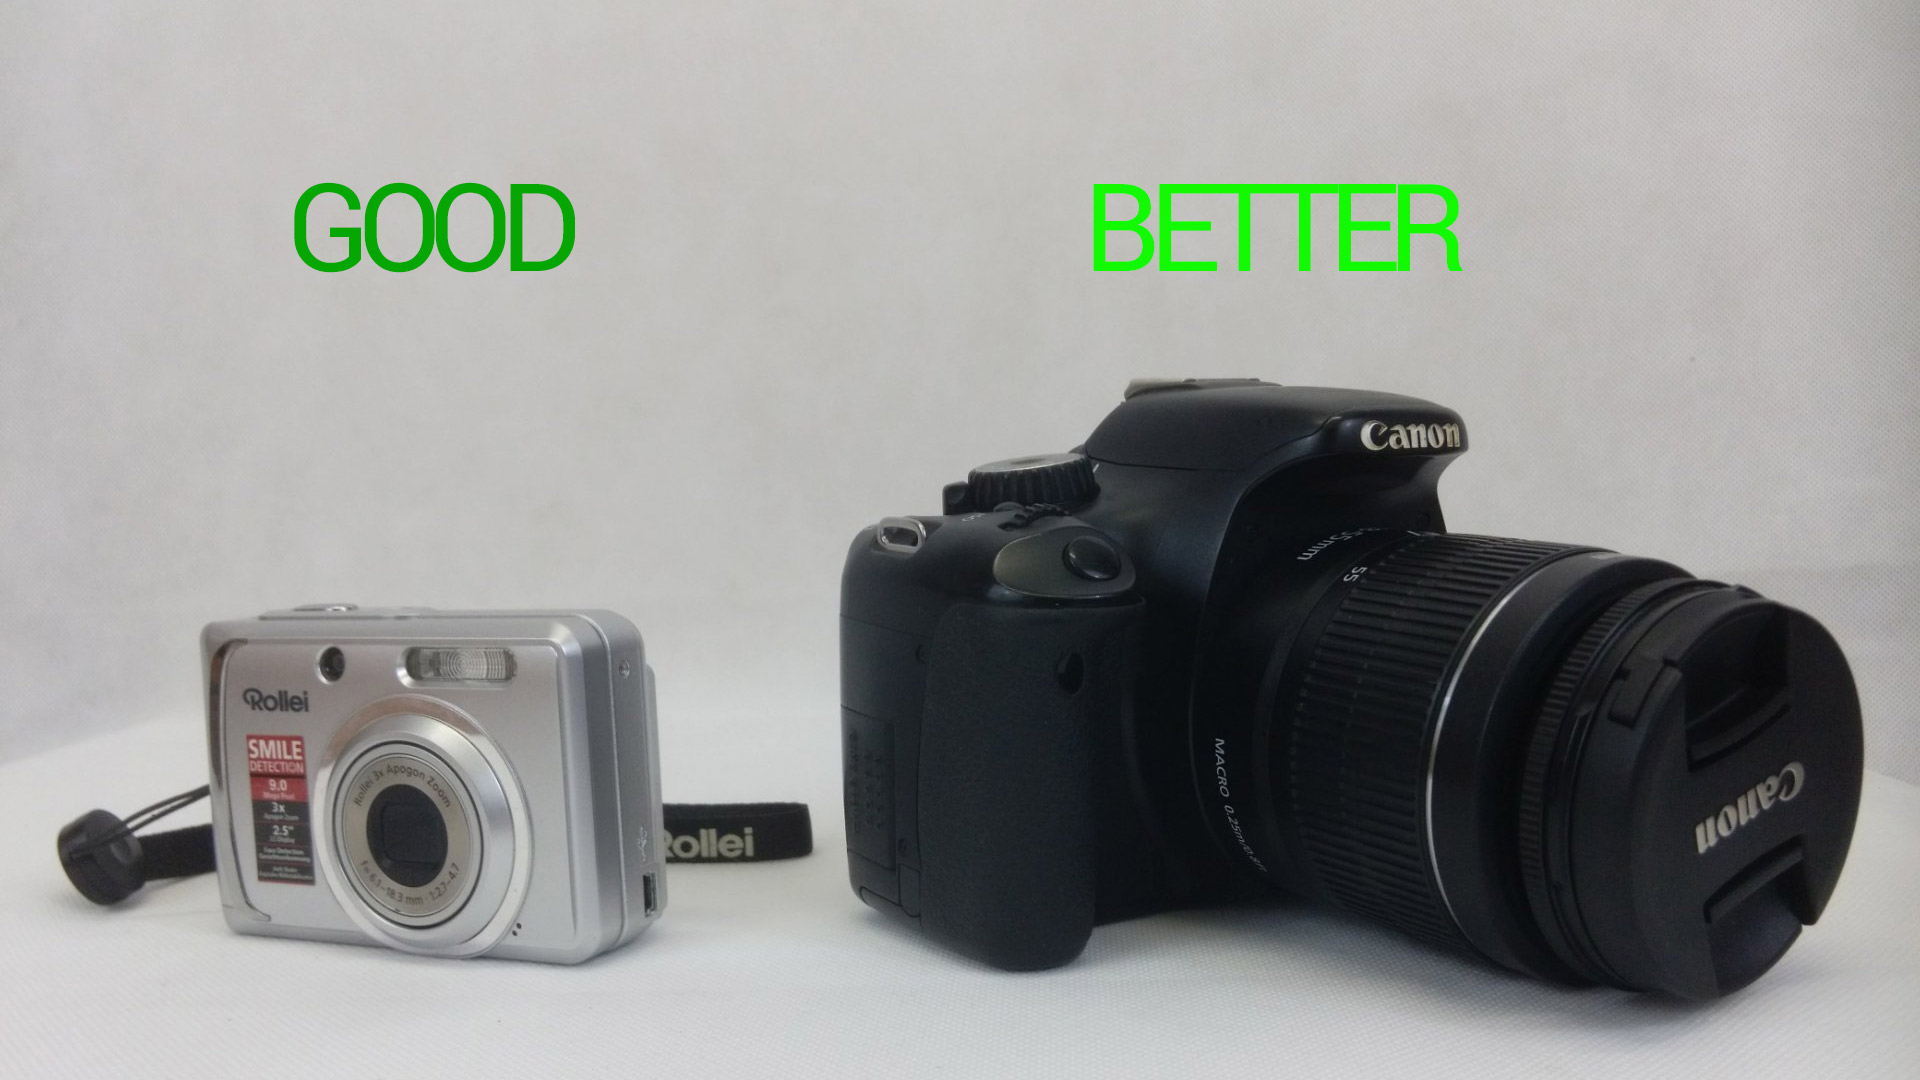
Photogrammetry has some requirements on the used hardware, although they are greatly influenced by the quality level you want to achieve. In theory, you can capture almost everything as good with your mobile phone's camera as with an expensive DSLR Camera, but obviously, the results will differ in the end.
Most of the previously mentioned Photogrammetry Software’s have their guides mentioning the required hardware to run their software, as well as the required capturing equipment. So that’s stuff you should check out before you start shooting.
A rough general guideline is, that you should use a camera with at least 5 megapixels, to get useable images, while around 12 are ideal. It is reasonable to remember that the resolution of the input images influences the quality of the processing results, but also the calculation time. Therefore, don’t go for a much higher resolution, if you don’t miss information in your photographs, or you calculate for days on every single object. More important than the pure resolution, is the size of the camera's sensor and the option to lock its ISO, since photogrammetry works on identifying small details across photos, you want shots to be as sharp and as free from sensor noise as possible.
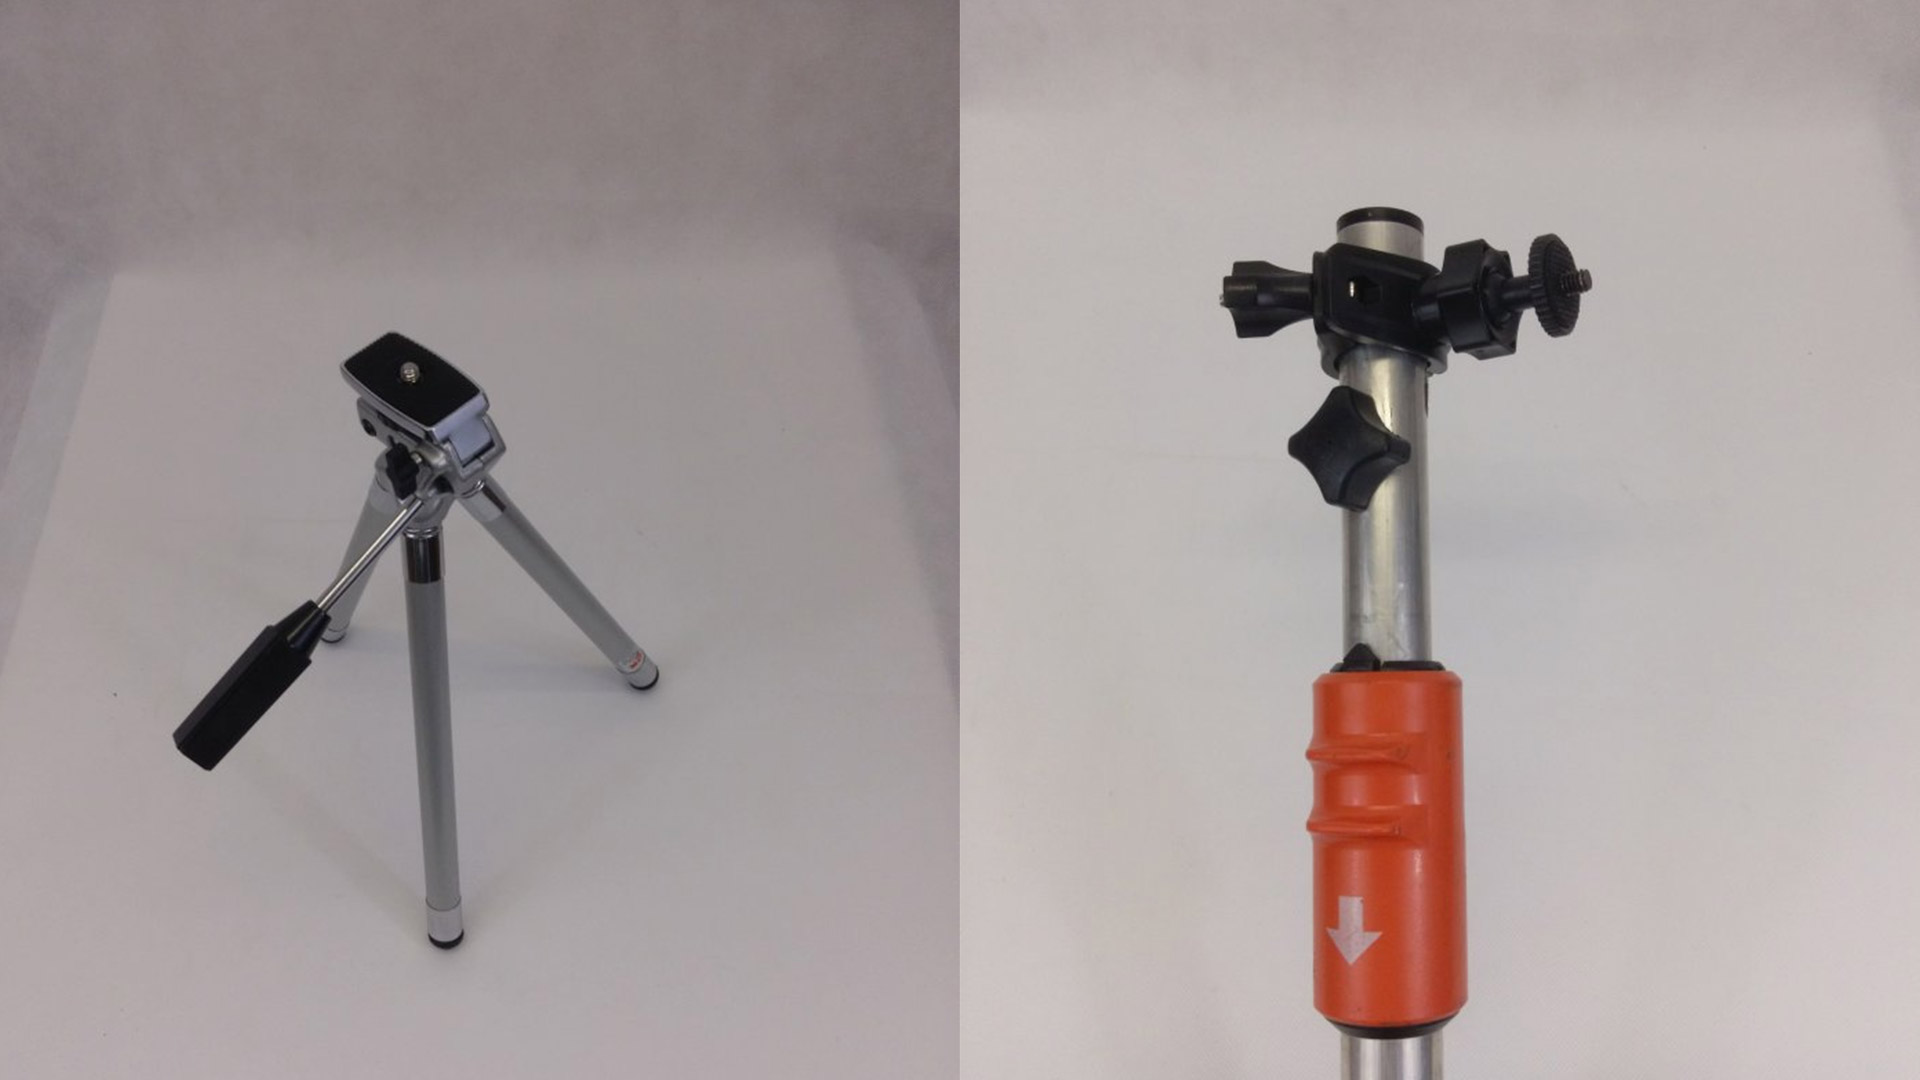
In addition to the camera, it’s also worth investing in a proper tripod or single pod, as blurred images are useless. A cheap alternative for a professional single stick is to simply mount a camera holder onto a telescopic bar from some gardening equipment.
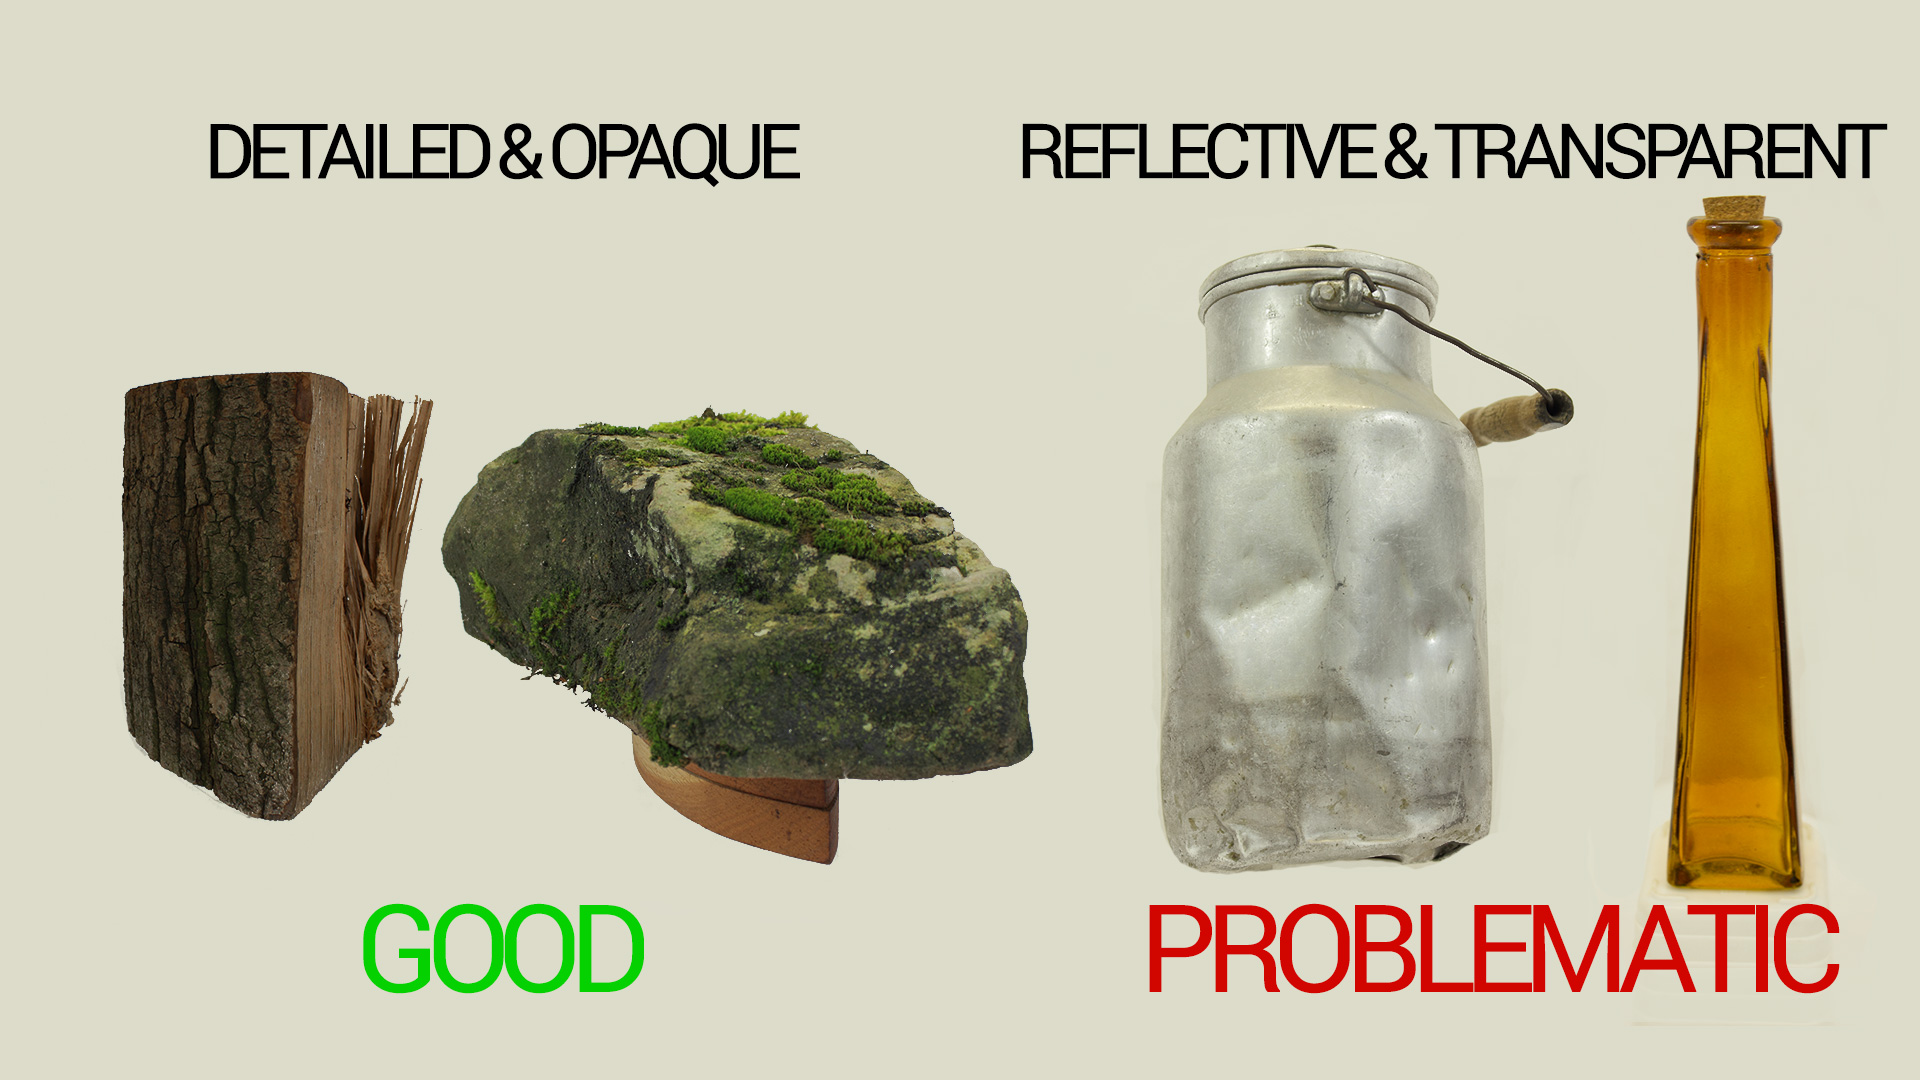
Limitations of Object/Material Types
Due to the fact how Photogrammetry works, identifying small details across multiple photos, there are some limitations regarding the objects which are capture-able. While things like cliffs, or stone walls capture perfectly well, due to their natural roughness, it’s hard, or impossible to capture shiny objects like cars, or transparent objects like glasses. This is caused by the fact, that the algorithm calculating the three-dimensional models in the software is trying to match the pixels between the different images which are provided. If it finds enough matching pixels between the images, it will be able to generate a point cloud from them, but specular highlights and reflections will horribly confuse it.
Therefore, try to capture matte or opaque objects only, but if you really need to capture shiny or transparent objects, you can try to cover all specular highlights and reflections. Some ways to do this is painting the object, or to sprinkle chalk dust over it, but keep in mind that you won’t get any texture information from your objects this way.
Influence of Lights & Shadows
Another important aspect of photogrammetry to keep in mind is the way you light your object while capturing it.
For objects, like props, that you want to place in different environments in your game, it’s imperative to capture them without any direct light pointing at them. This light would be baked into the texture in the end, which results in odd lighting if not all objects in the scene are captured with the same light influence.
On the other hand, if you capture an entire scene, like a small room, this direct light influence might be exactly what you want. This baked light will look very realistic (because it is real ;D) and does not require any additional light set up in your game if you don’t need any dynamic light sources.
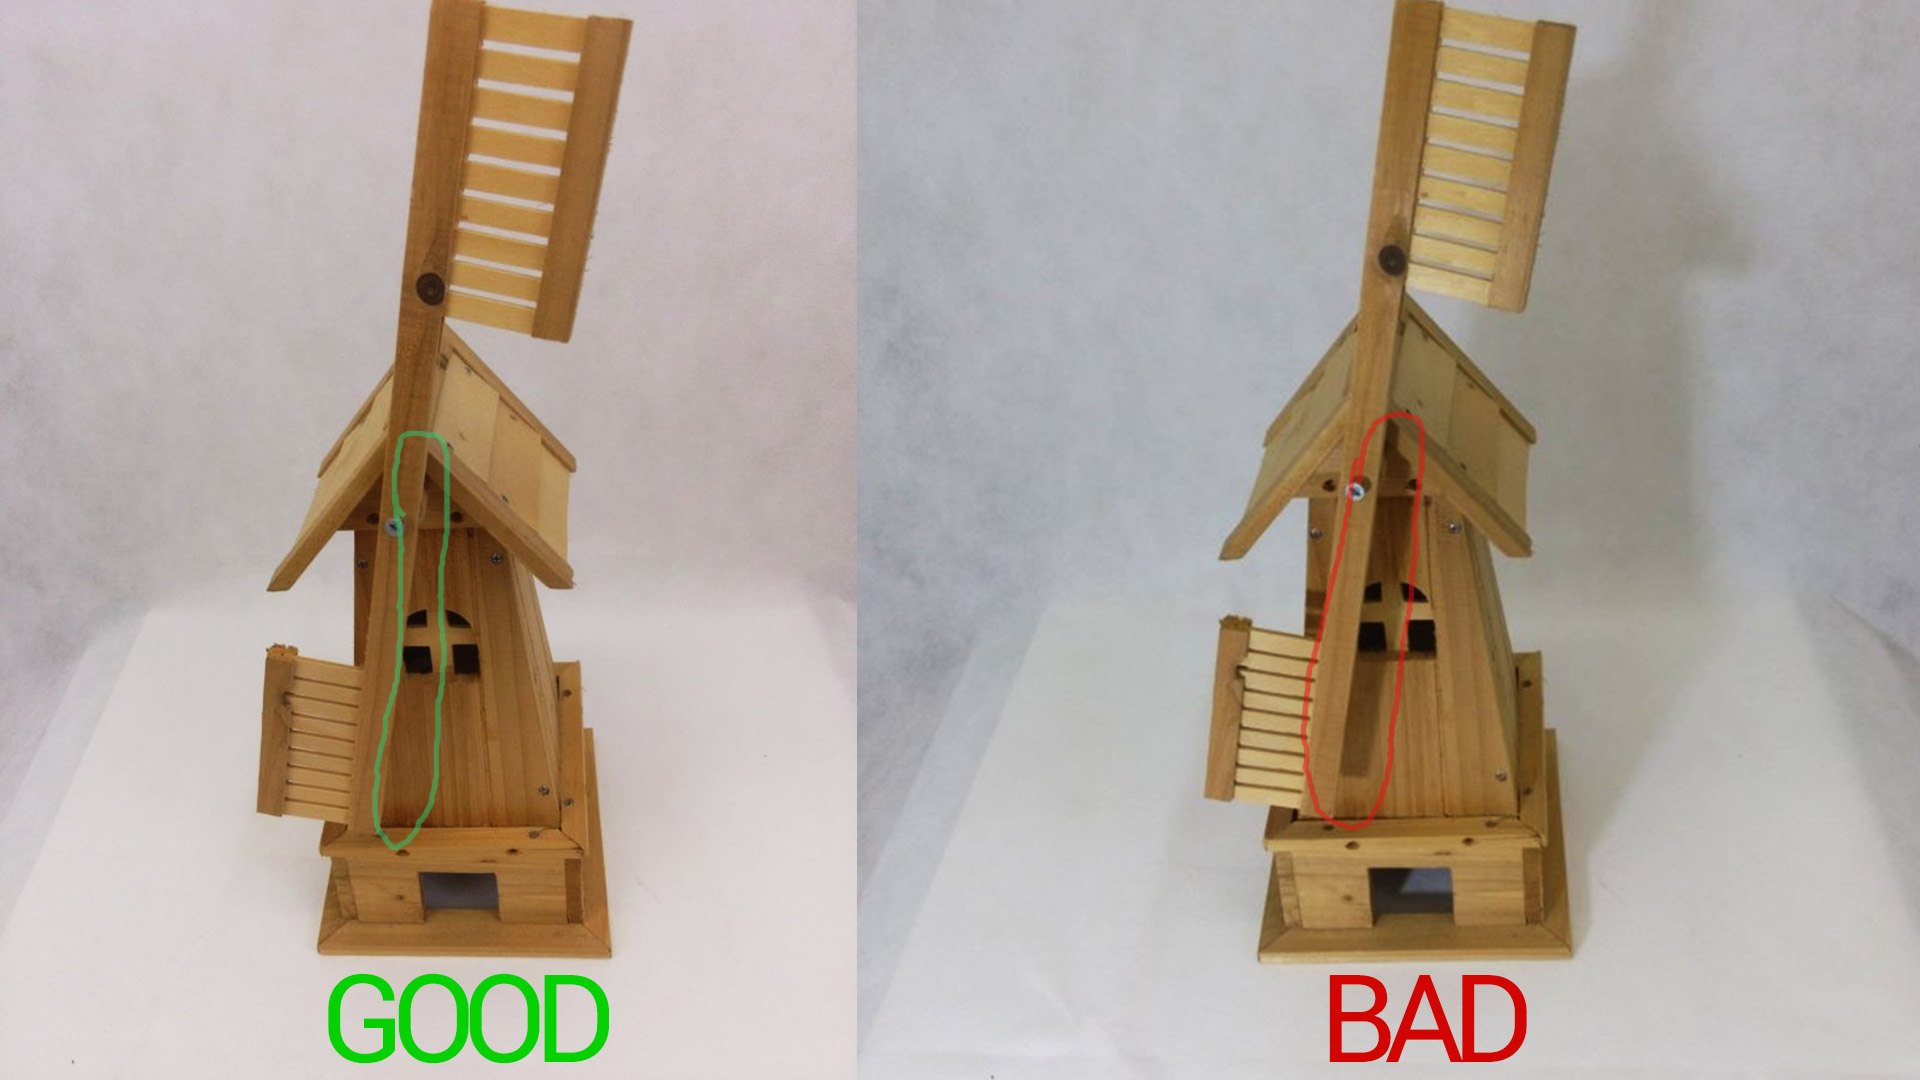
Another thing to keep in mind, that applies to both mentioned use-cases, is to avoid strong shadows or highlights caused by a wrong light setup. As each photograph needs comparable pixels with its neighbors in the image sequence, its self-speaking, that strong shadows, or highlights would confuse the comparing algorithm. The same part of the object would have different color values, or totally white or black pixels, that end up in artifacts, or skipped points in the point cloud.
Therefore, it’s important to capture objects in as diffuse light as possible, to avoid any unwanted shadows, or strong highlights in the image sequence. If you want to capture smaller objects and have some equipment like a light diffuser to hand, it’s advisable to light your object equally from all sides with them, to get rid of the shadows. If you don’t have access to this hardware just try to avoid any direct light on your object, or capture you’re your scene on a cloudy day if the sun isn’t shining too strong.
Definition of the problem
The previous research shows some limitations of photogrammetry regarding the type of objects and materials, as well as the surrounding in form of light and reachability by the photographer. Furthermore, it's visible that with photogrammetry created 3D models can offer beautiful natural and irregular textures, which are hard to create for artists. In addition, the creation of certain meshes can be quicker with photogrammetry, compared to the regular modeling & texturing workflow depending on their characteristics and the available resources.
Main Question
Therefore, the following main question can be formed:
What are beneficial use-cases for photogrammetry in a 3D game?
Sub Questions
Now after our main research question is formulated, we have to find out, what is needed to answer it, while staying within the scope of this report. Therefore, we have to clarify a few things upfront:
How useful is photogrammetry for scanning objects that are used in a 3D game?
What kind of objects are suitable for photogrammetry?
What challenges are there when applying photogrammetry?
With answers to these sub-questions, it’s possible to conclude which technique can be preferred on a given use case. Although as the previous research showed, that both techniques have their own limitations and ideal use cases, this paper is not going to give a fixed rule, but rather a recommendation for certain use cases, in which one technique could be preferred over the over.
Scope
The scope of this report is bound to the research, that is required to recommend one of the listed asset creation techniques, for certain use cases, or project requirements.
Factors that are influencing this recommendation are the technical limitations and advantages of both techniques, as well as their usability for the artist.
Points that are out of the scope of this report, but could have influenced the recommendation of this report are, although briefly mentioned, partly automated asset pipelines with self-written scripts, or additional software packages and additional hardware like automated turntables.
Research and Design
The main research method, which is used to gather the data required for the recommendation of this paper is to validate the gathered background data with some praxis-oriented test cases.
These test cases are built to answer the list of sub-questions, which are raised while collecting the background information needed for this research. While the collection of this background information helped to figure out the more and less important aspects of the compared asset creation workflows, they give no clear answer to the main question. Therefore, the test cases are used to verify the collected theoretical data and also to give a more in-depth answer to the given main question. In addition, they offer some interesting content to visualize the more theoretical parts of the investigated techniques.
To be able to find out the pros and cons of photogrammetry I selected some best and worst-case scenarios based on my previous research and looked for suitable objects to represent each of these scenarios. These scans should help to verify the previously made research or to find additional points of interest.
I ended up with the following objects for the different scan scenarios:
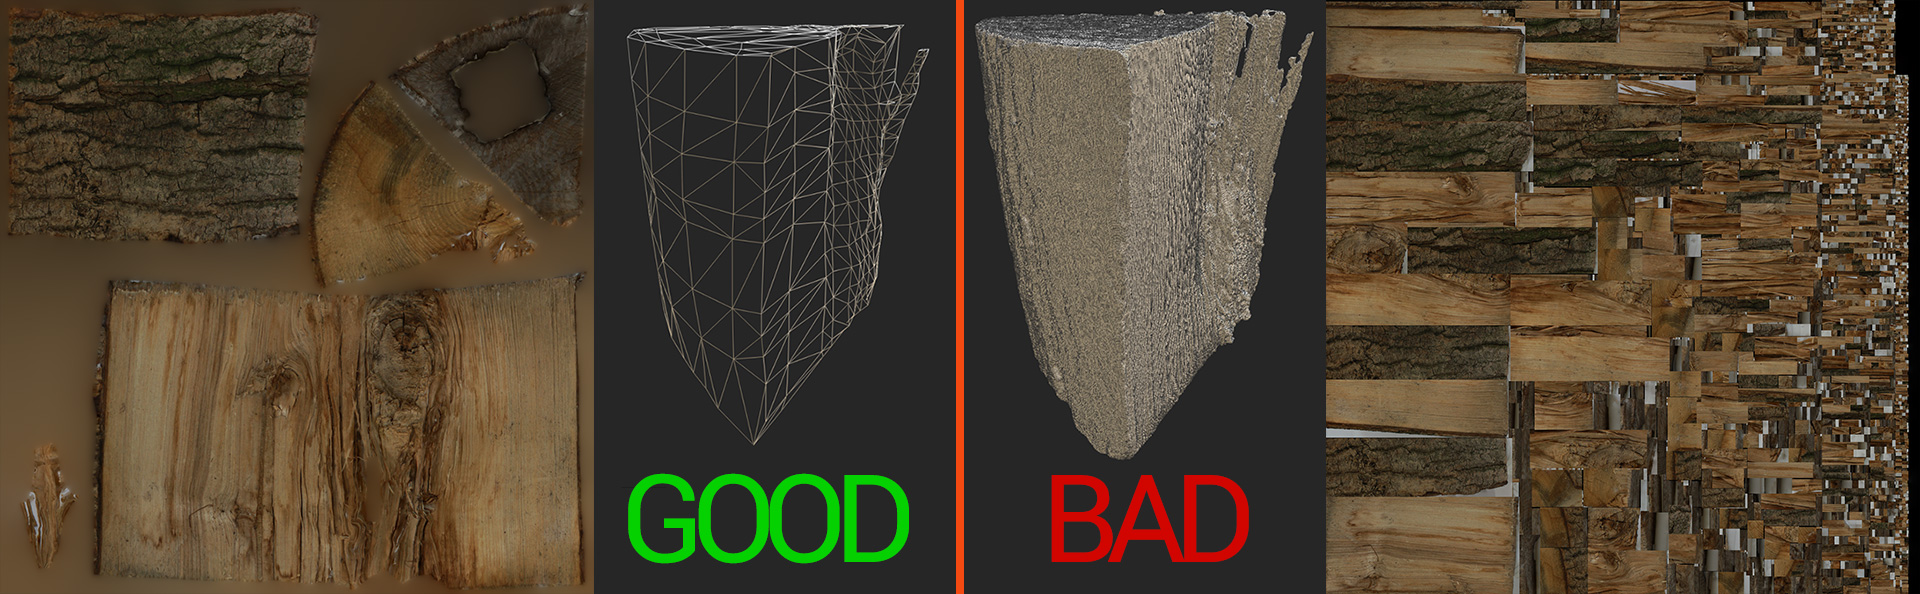
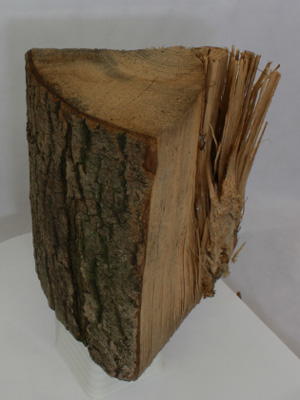
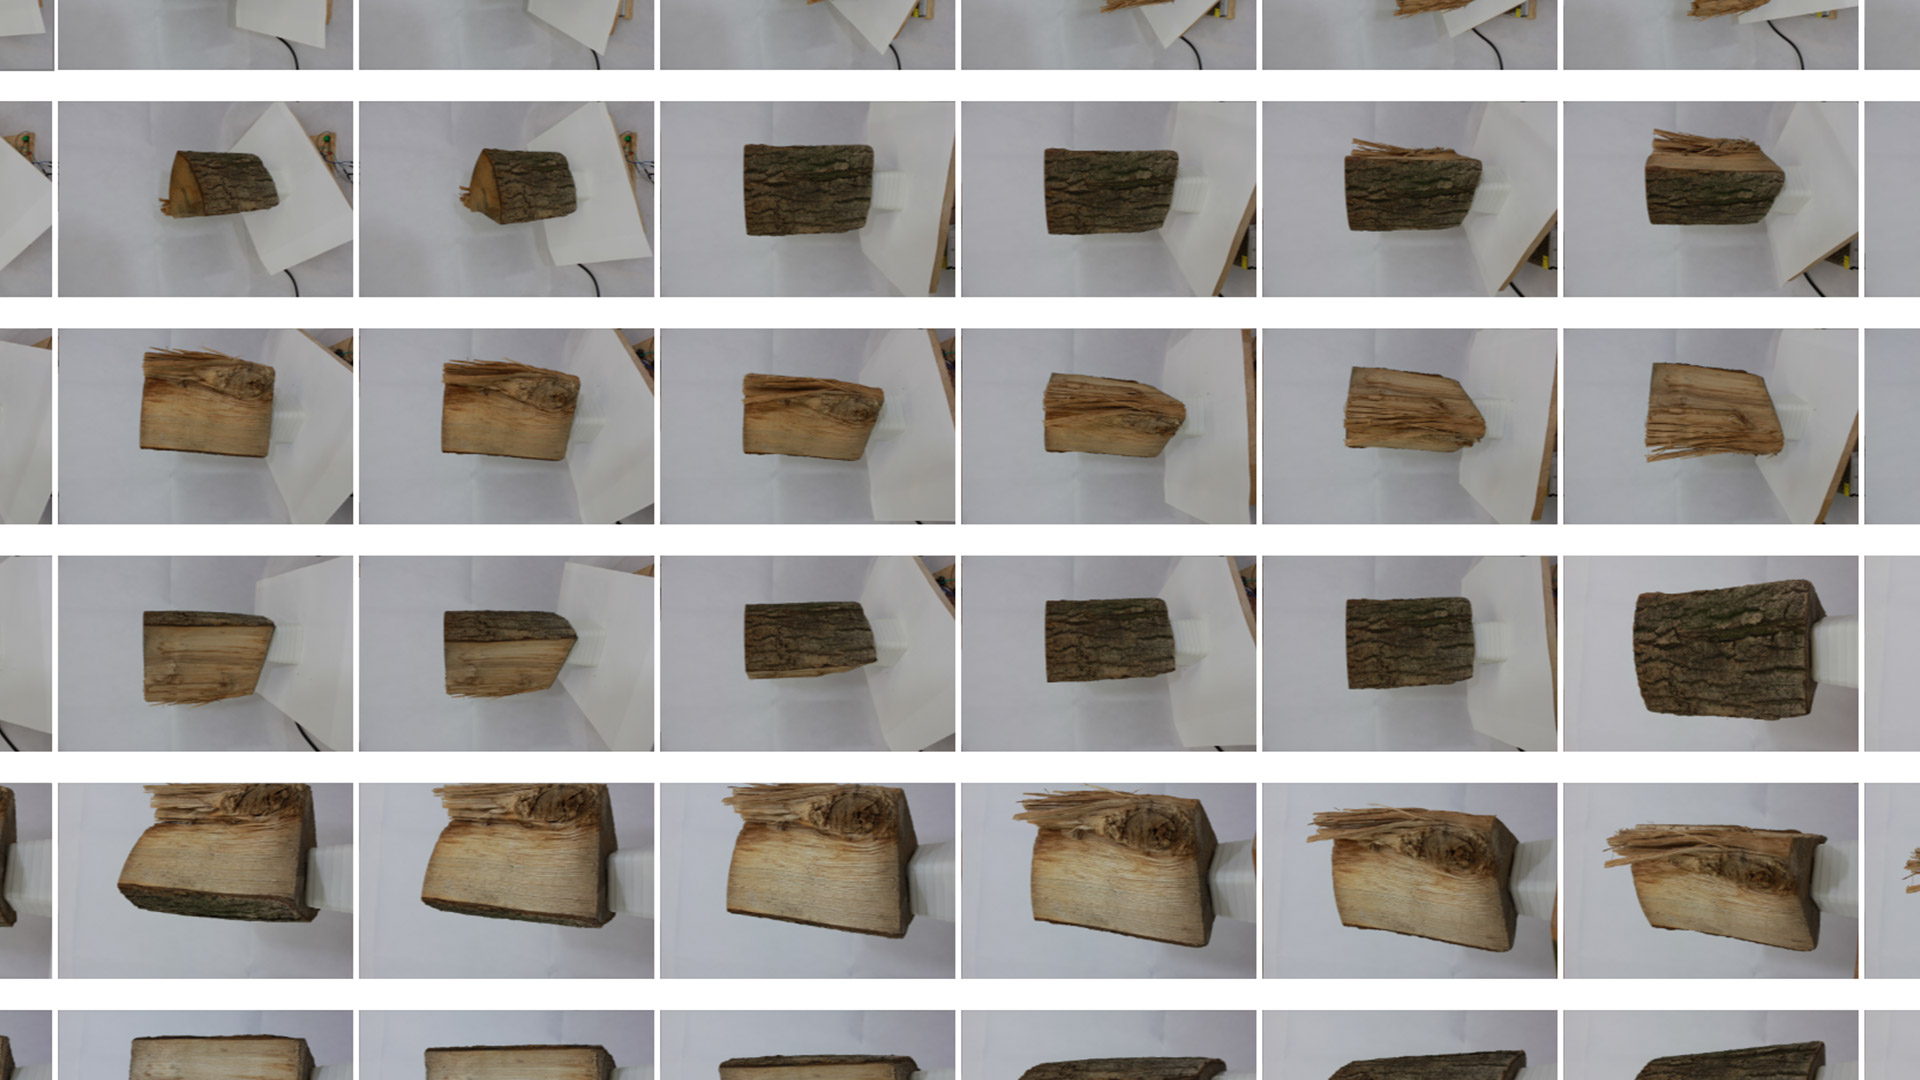
Wooden log – Represents an ideal use case for photogrammetry due to the detailed organic shape. In addition to that, it's easily moveable, thus simplifying the scanning process
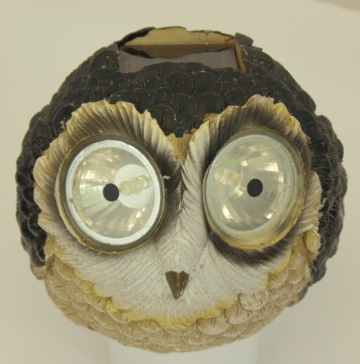
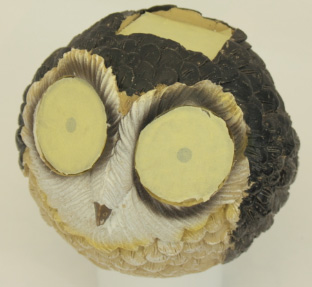
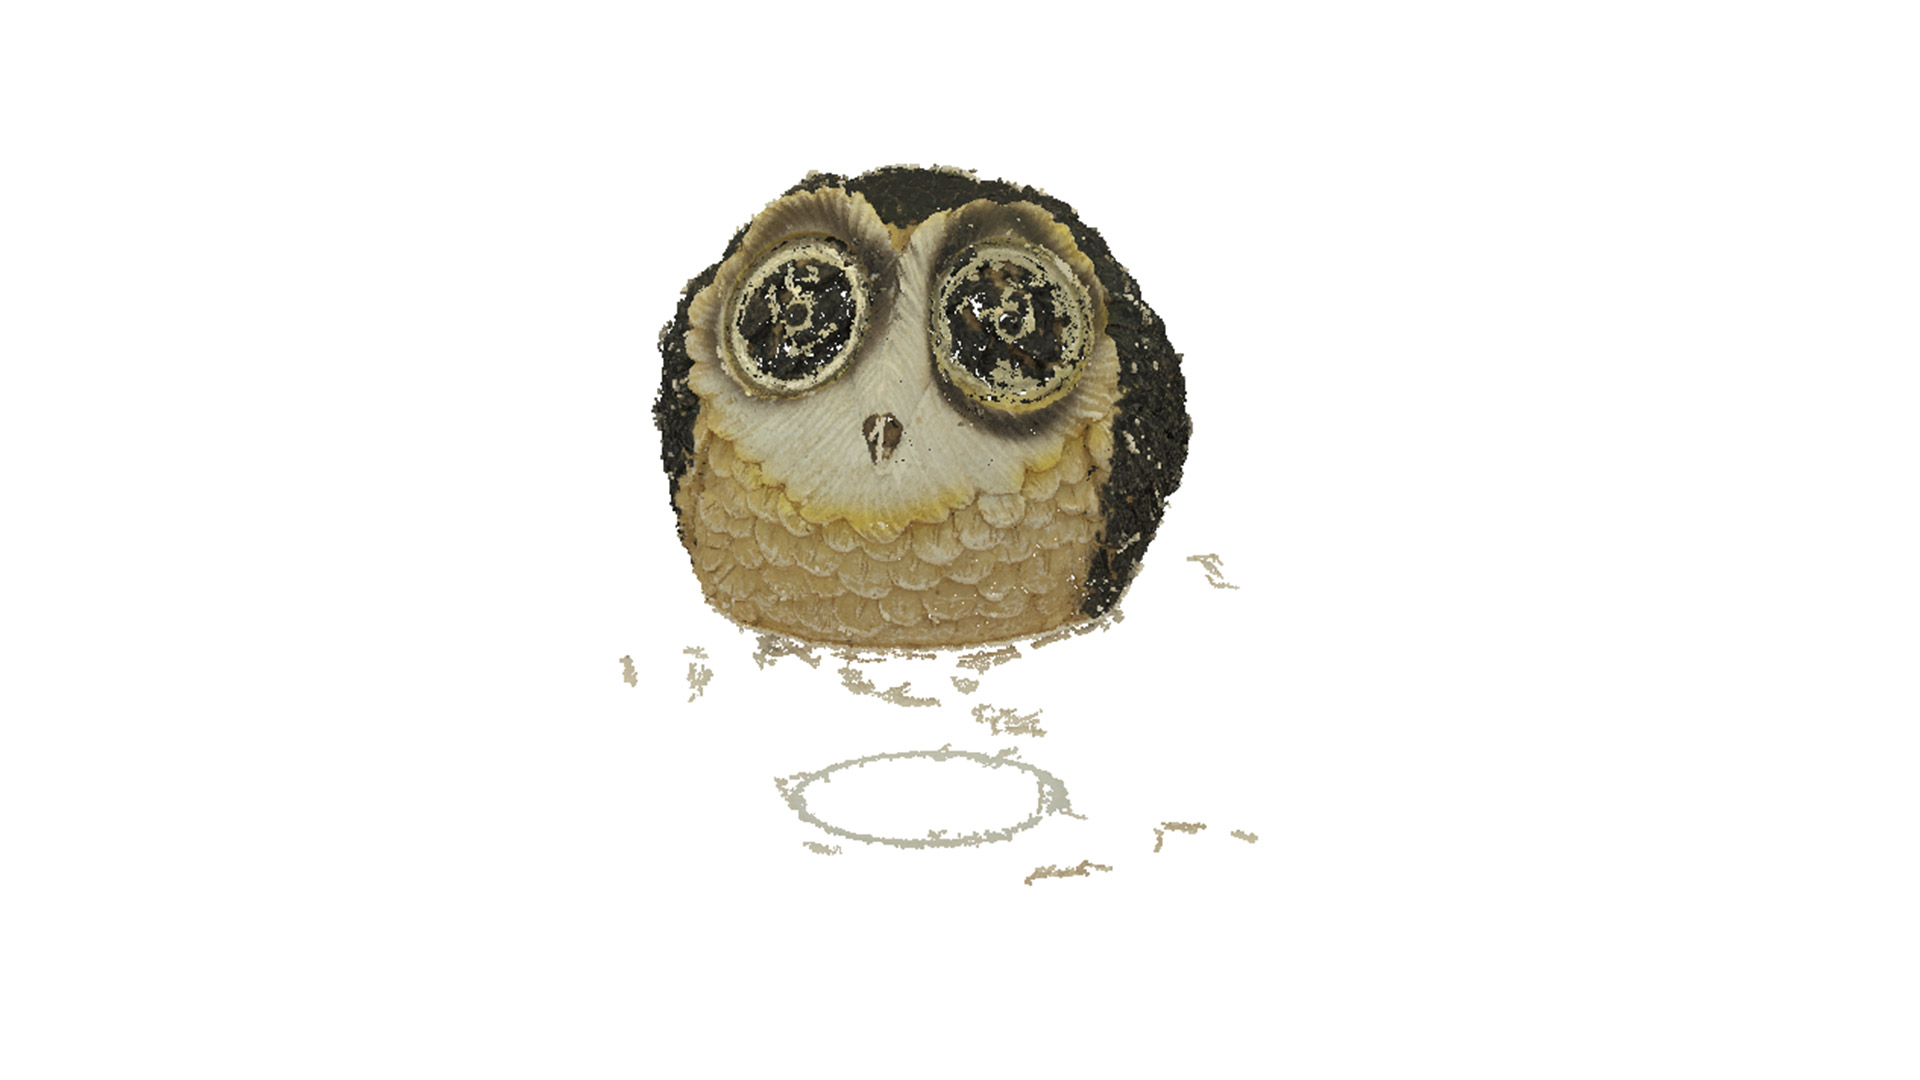
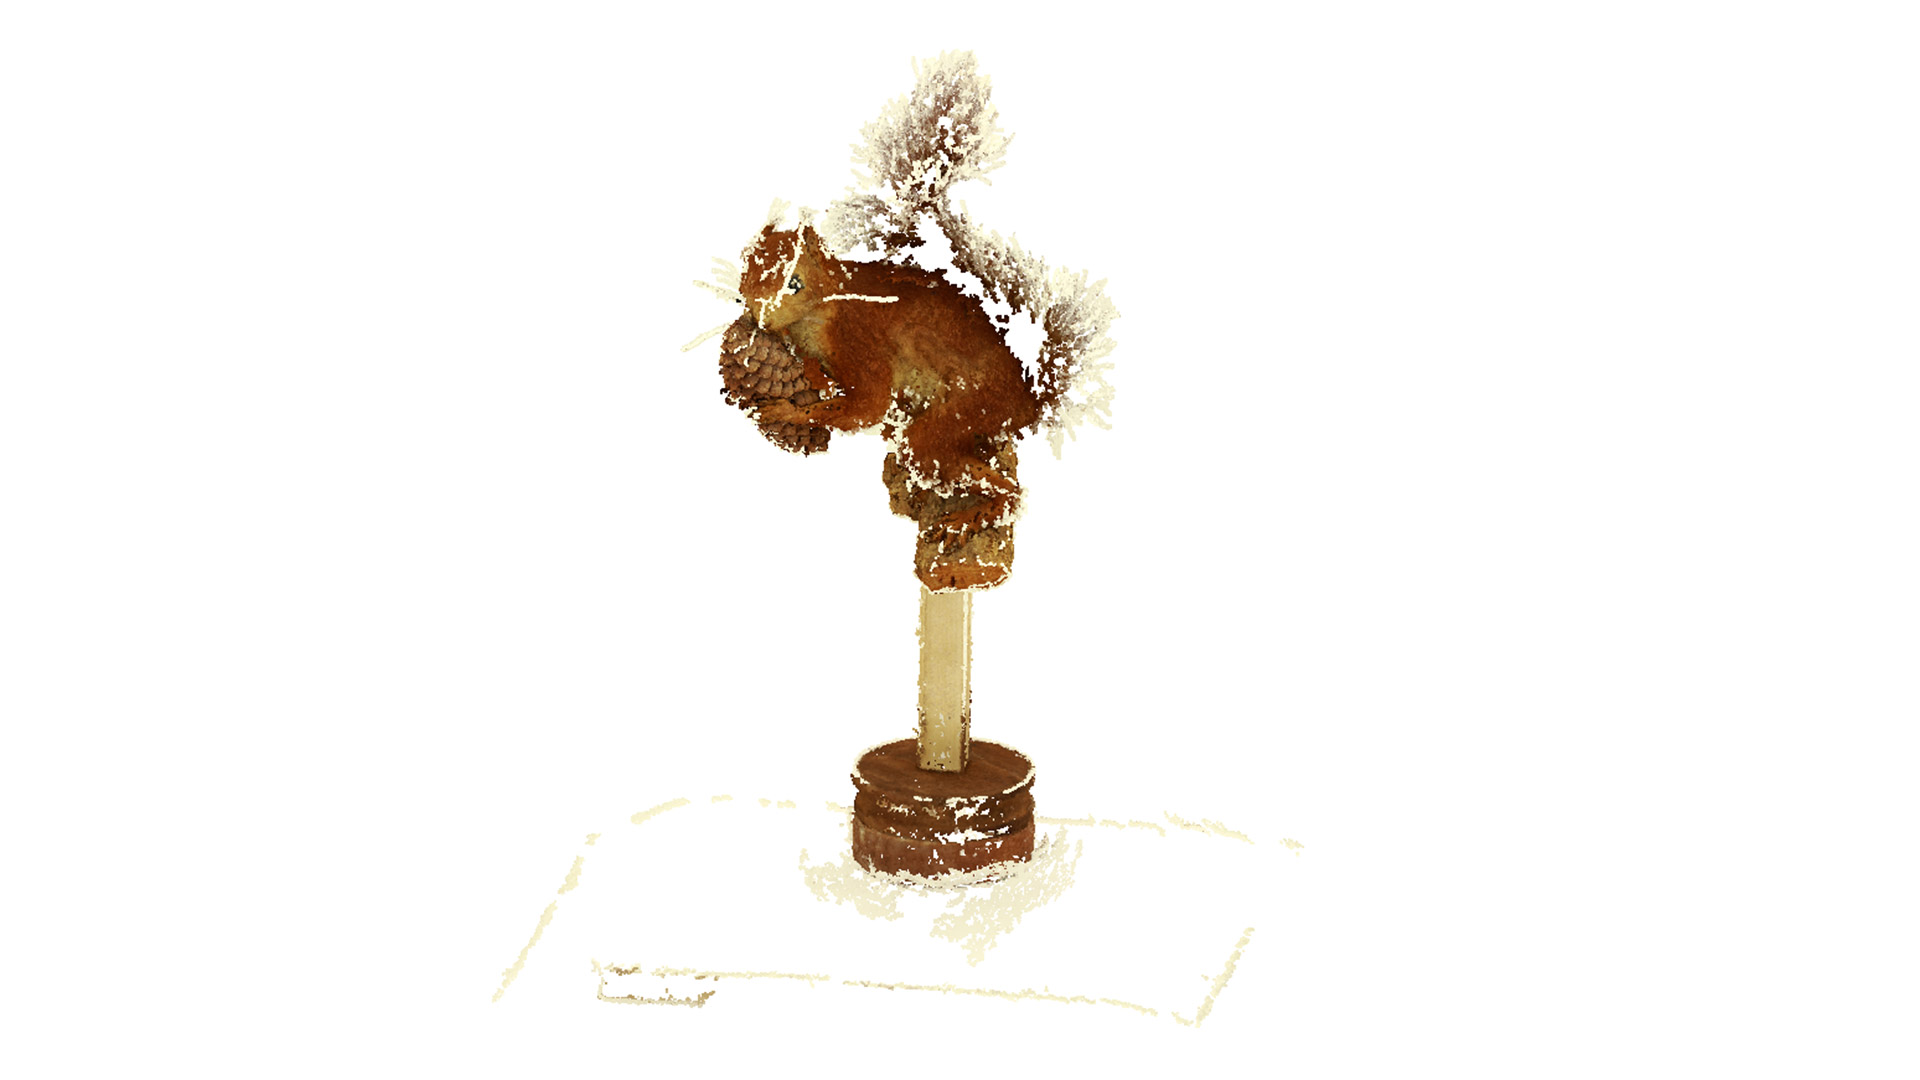
Owl Decoration – Represents a more problematic, but still doable use case for photogrammetry due to the transparent parts of the object.
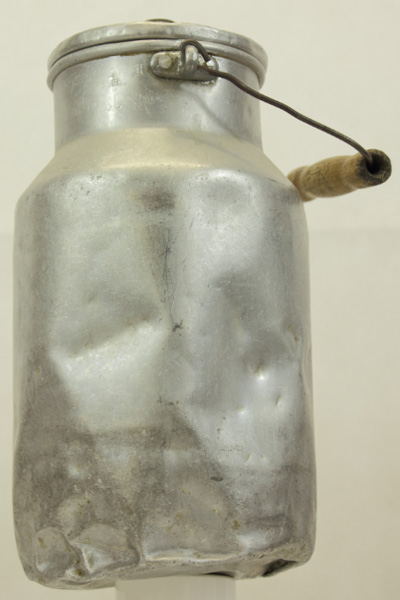
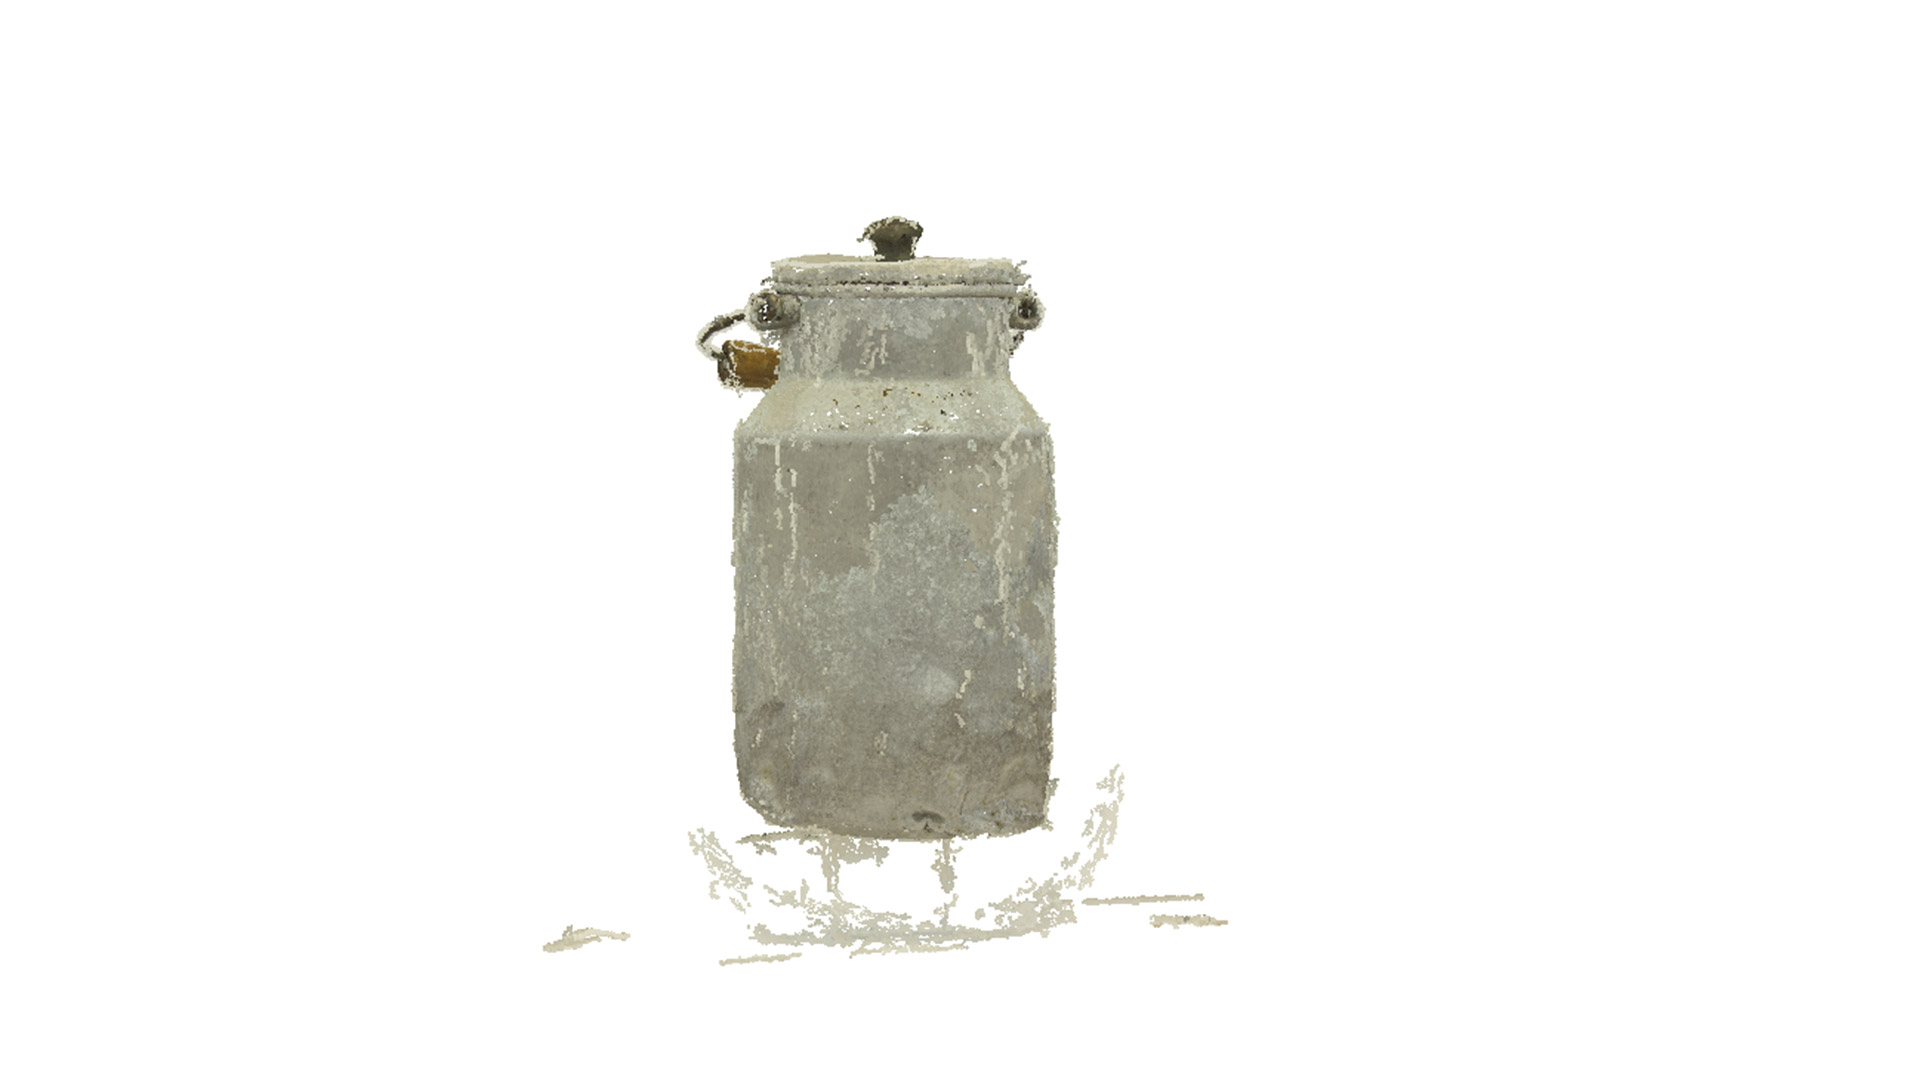
Milk Can – Represents a bad, but still a doable use case for photogrammetry due to the strong reflection and smaller parts of the surface.
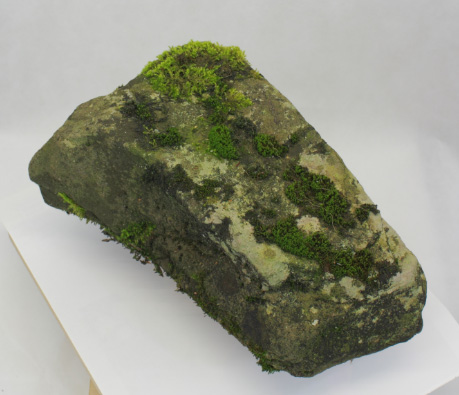
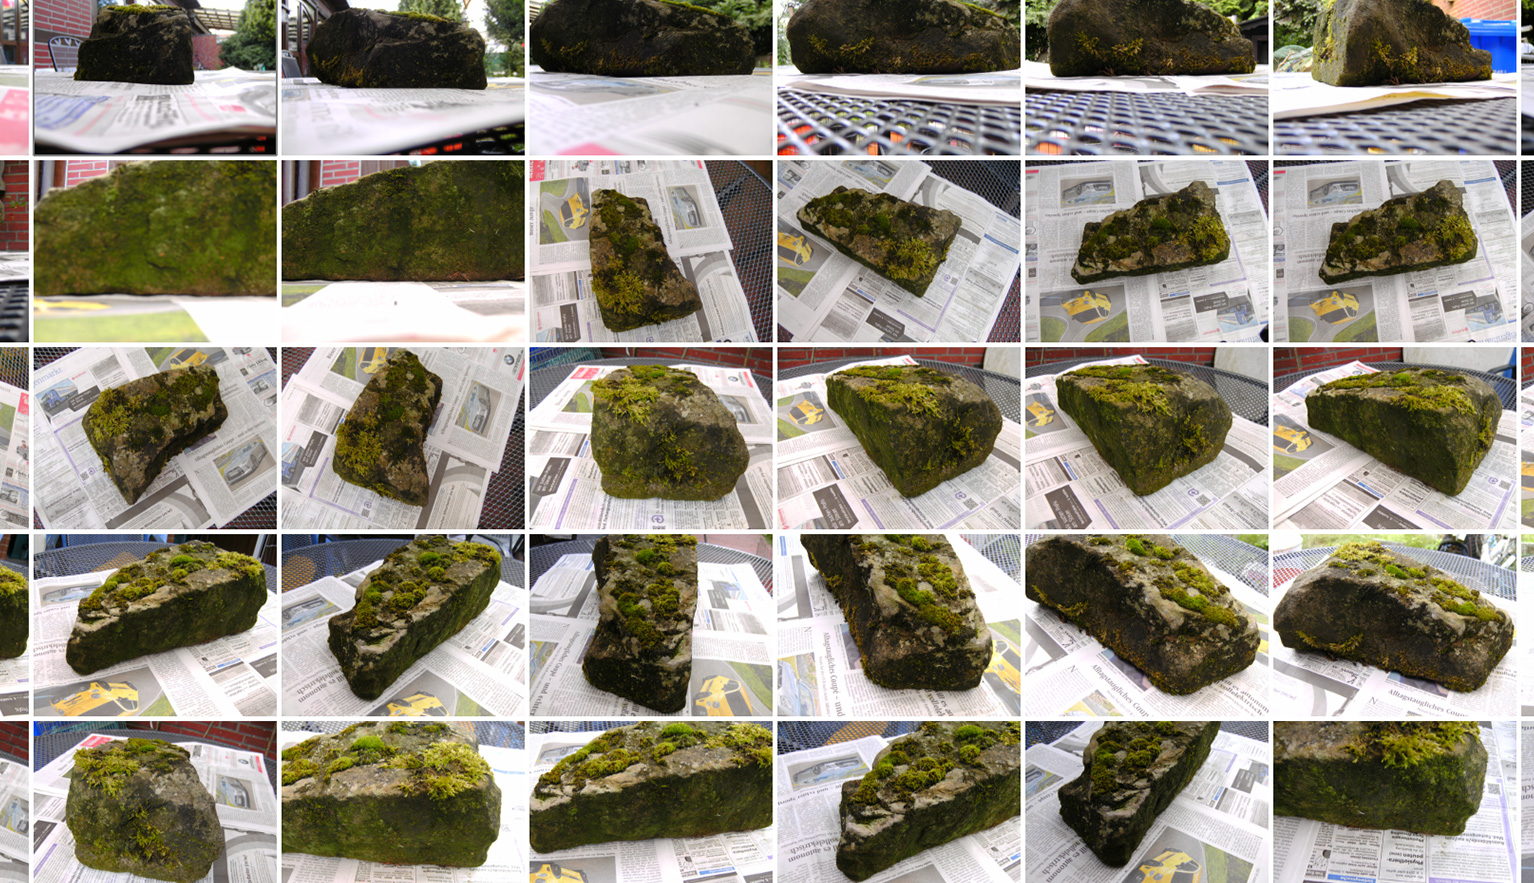
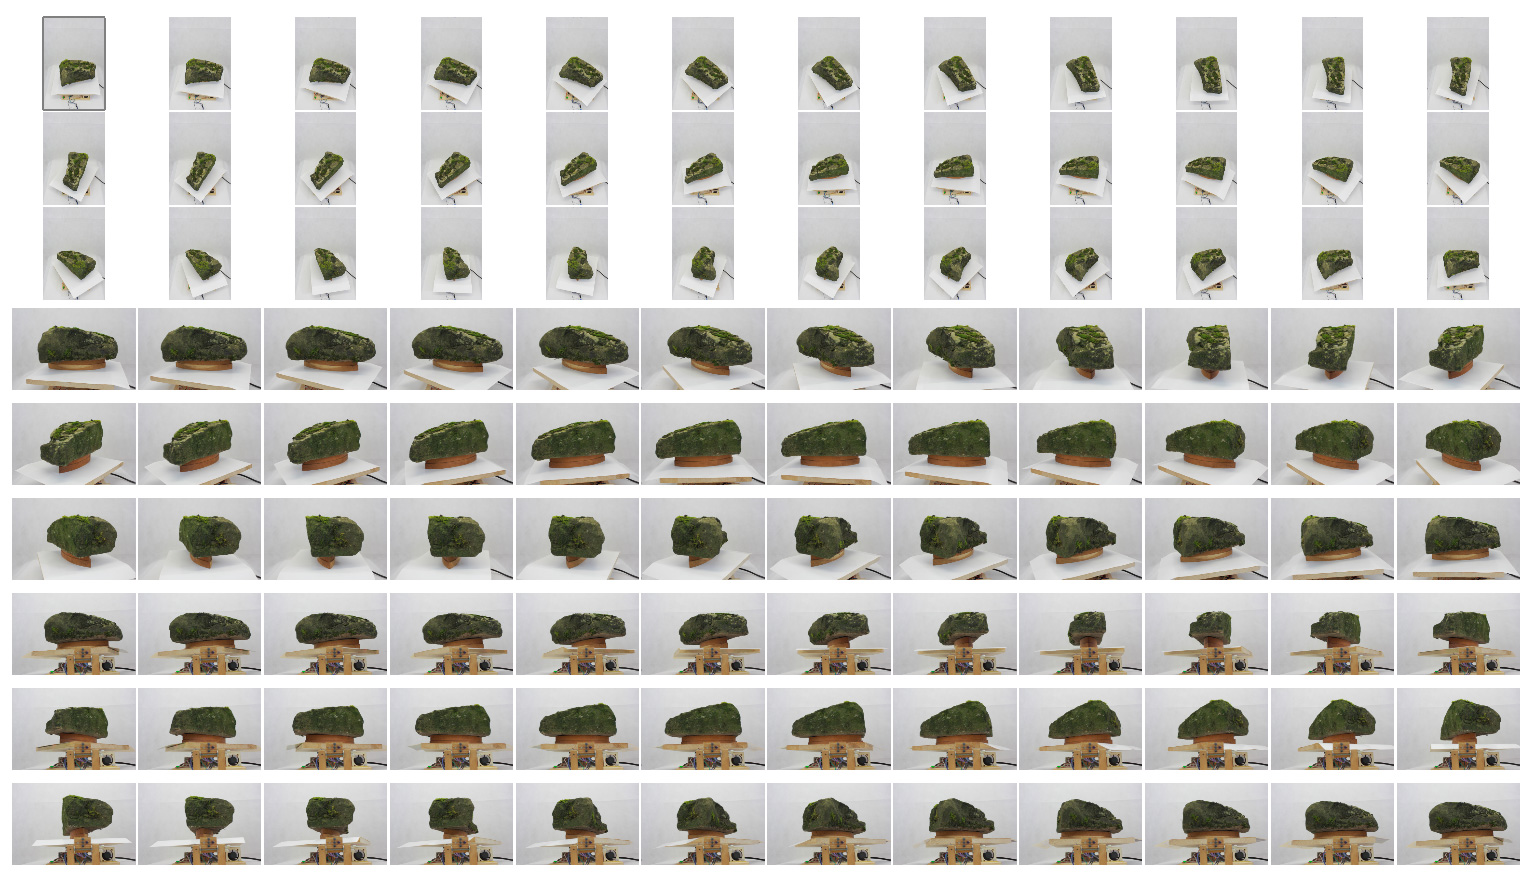
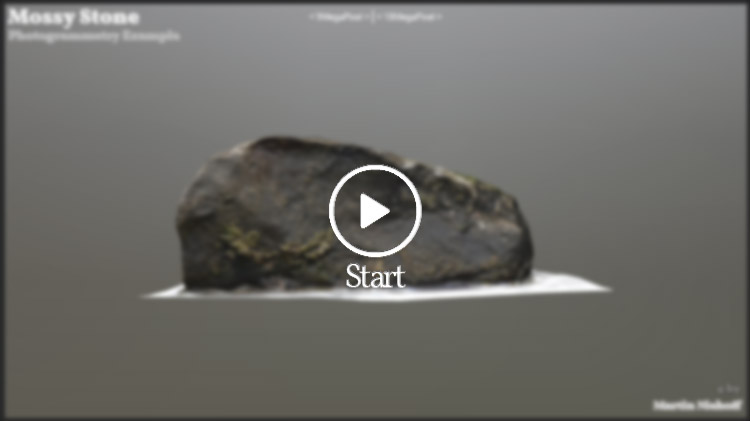
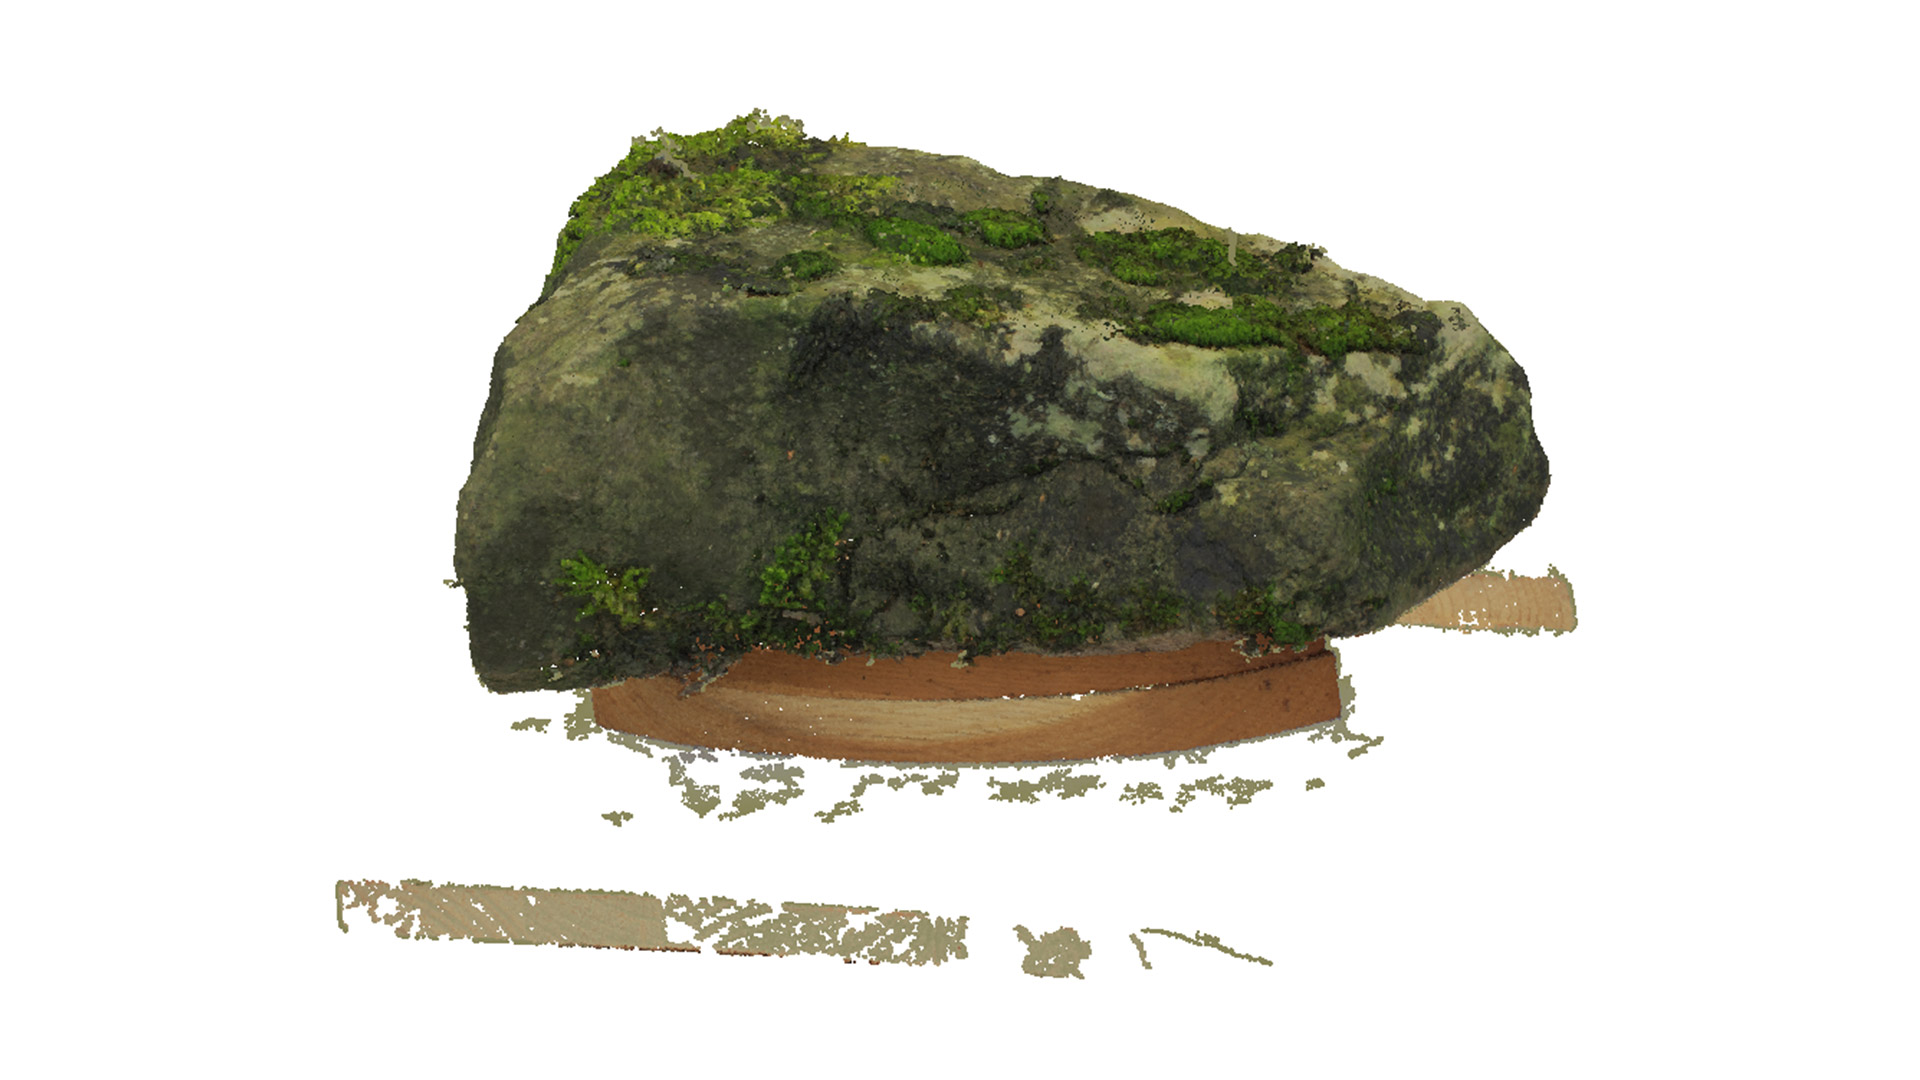
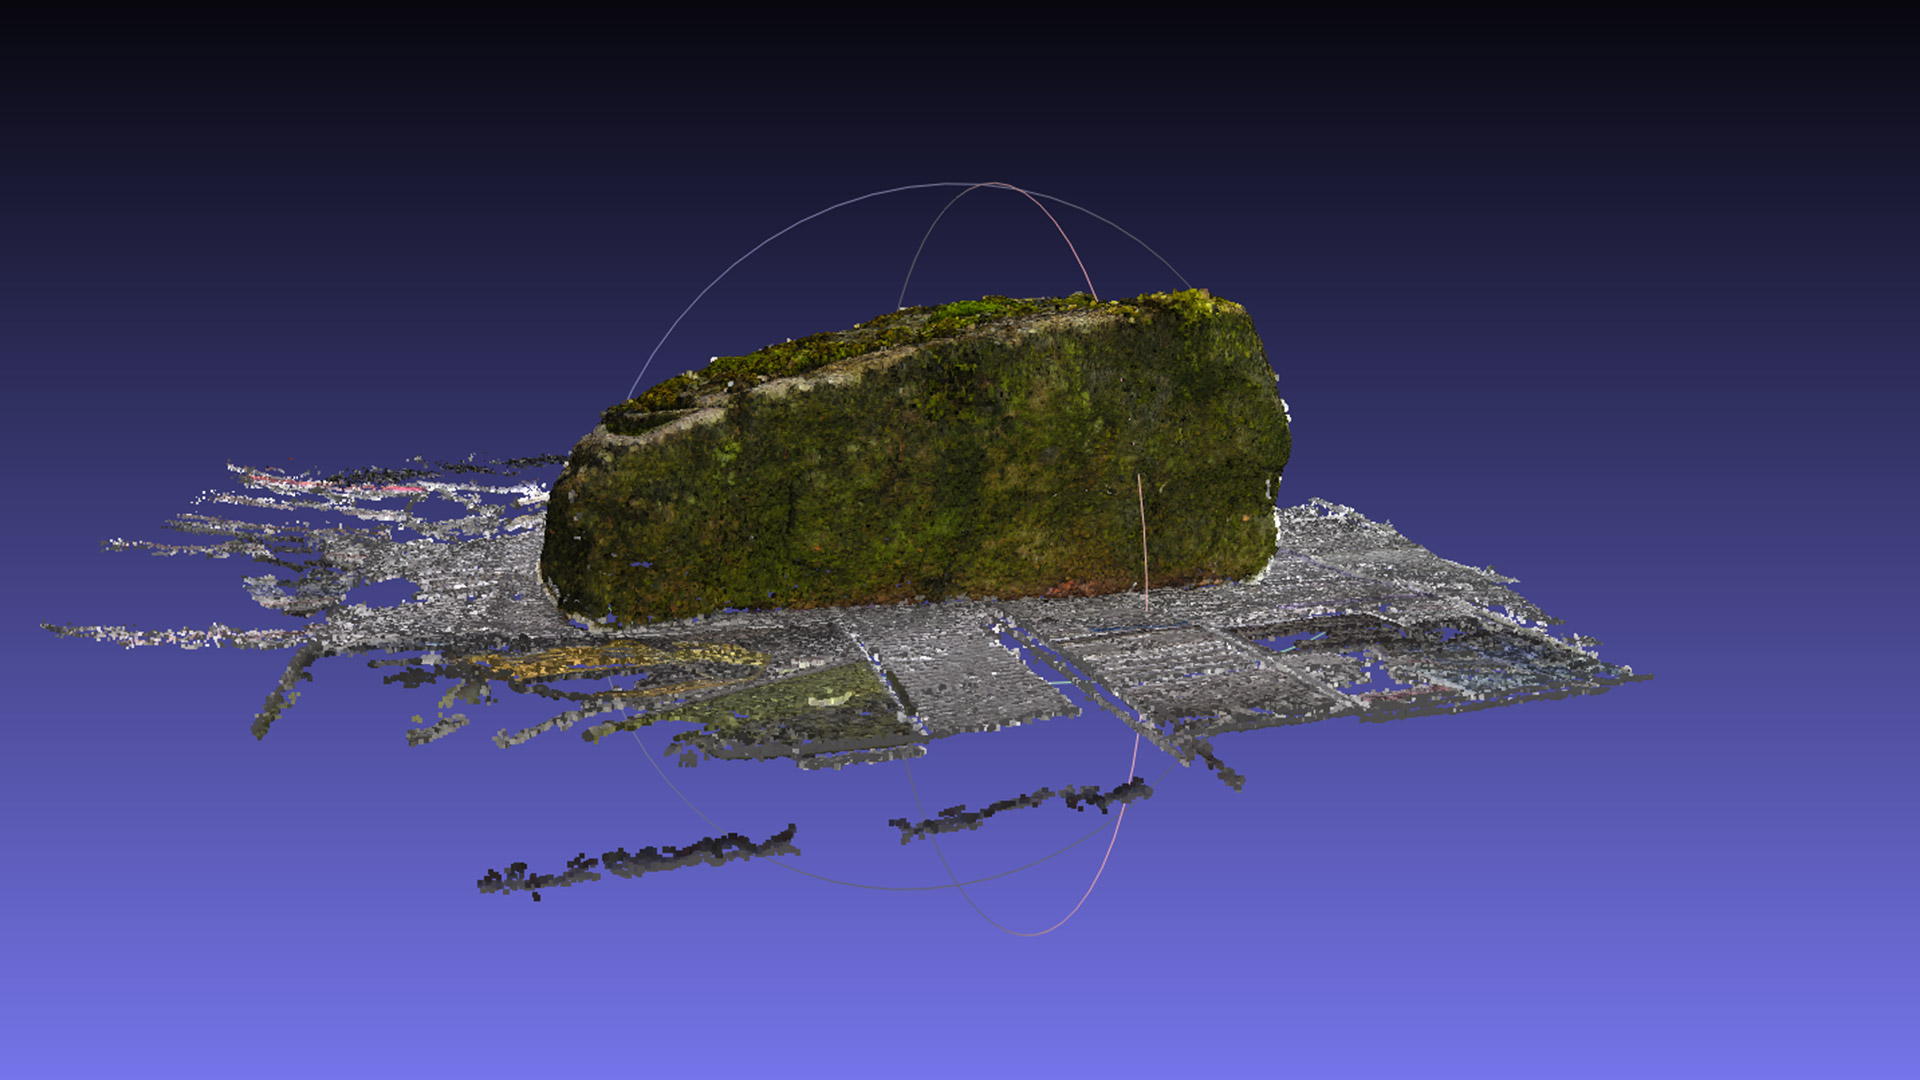
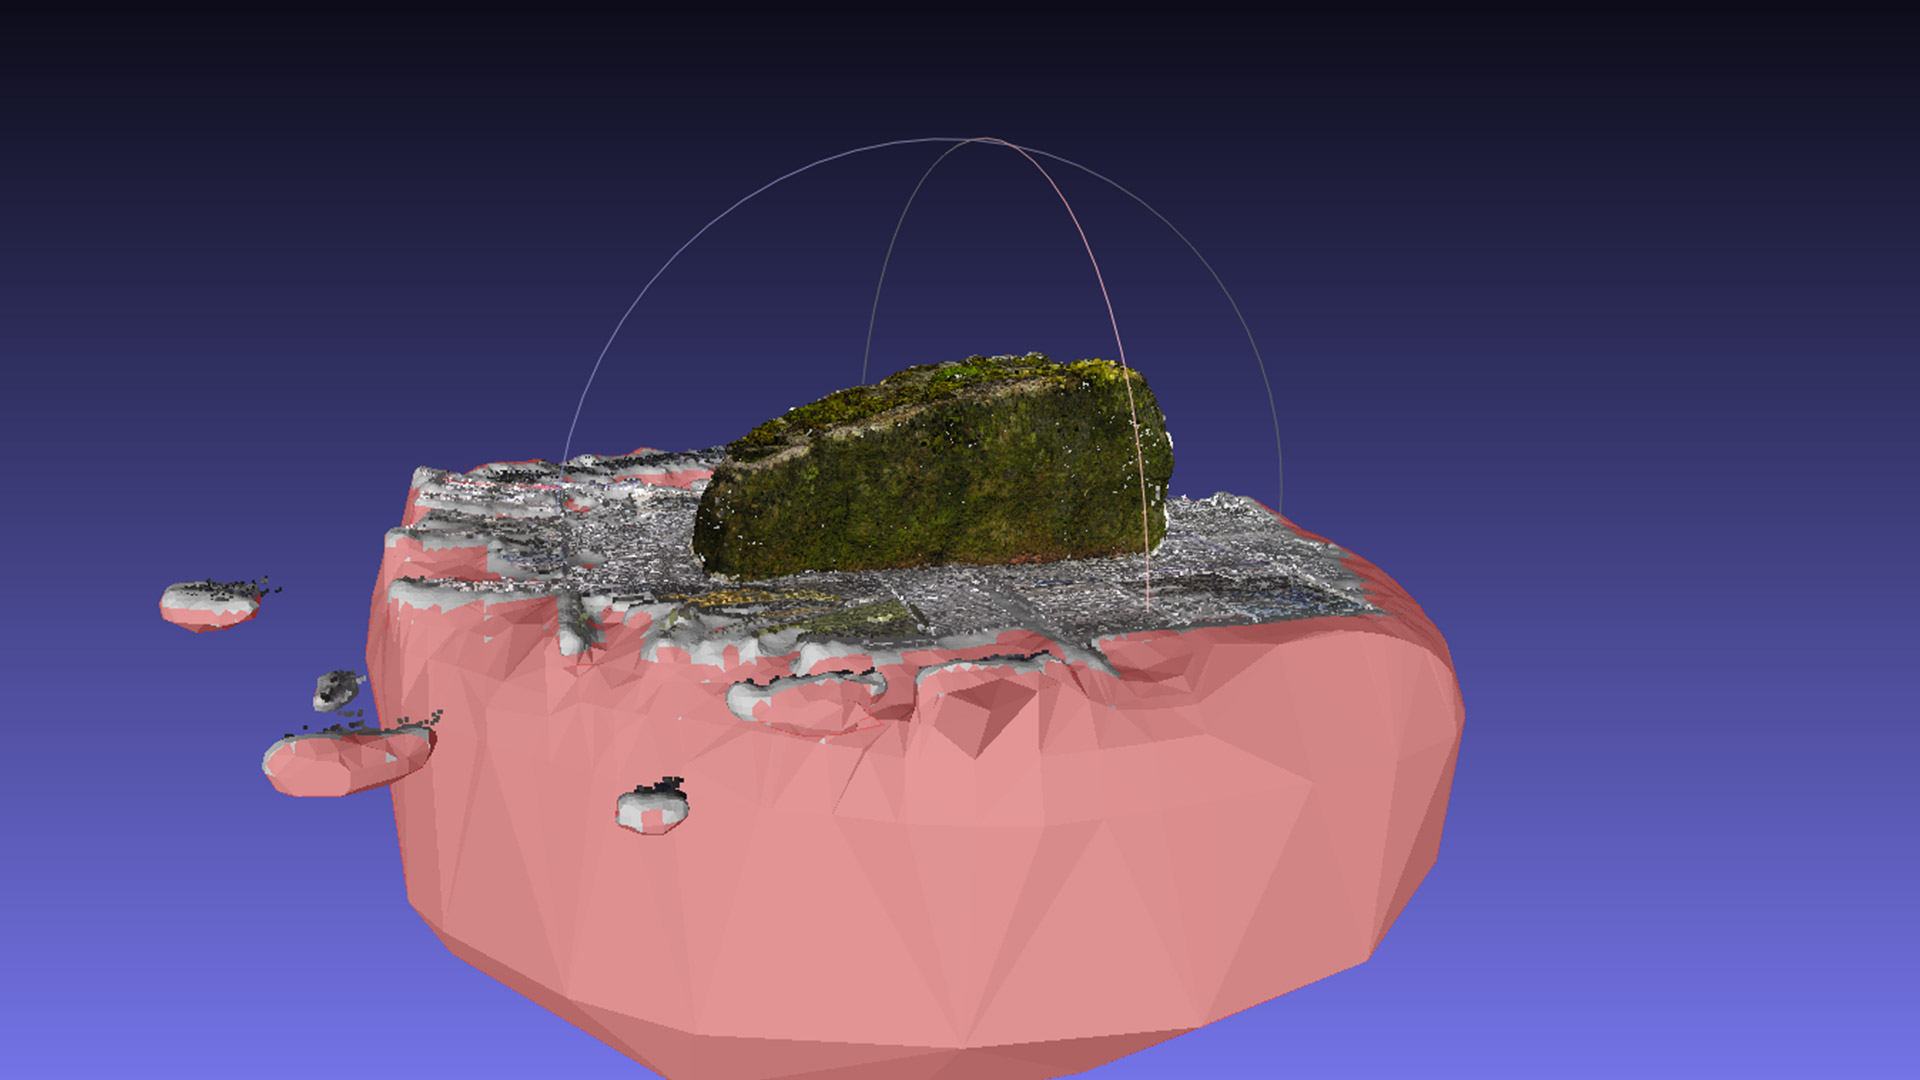
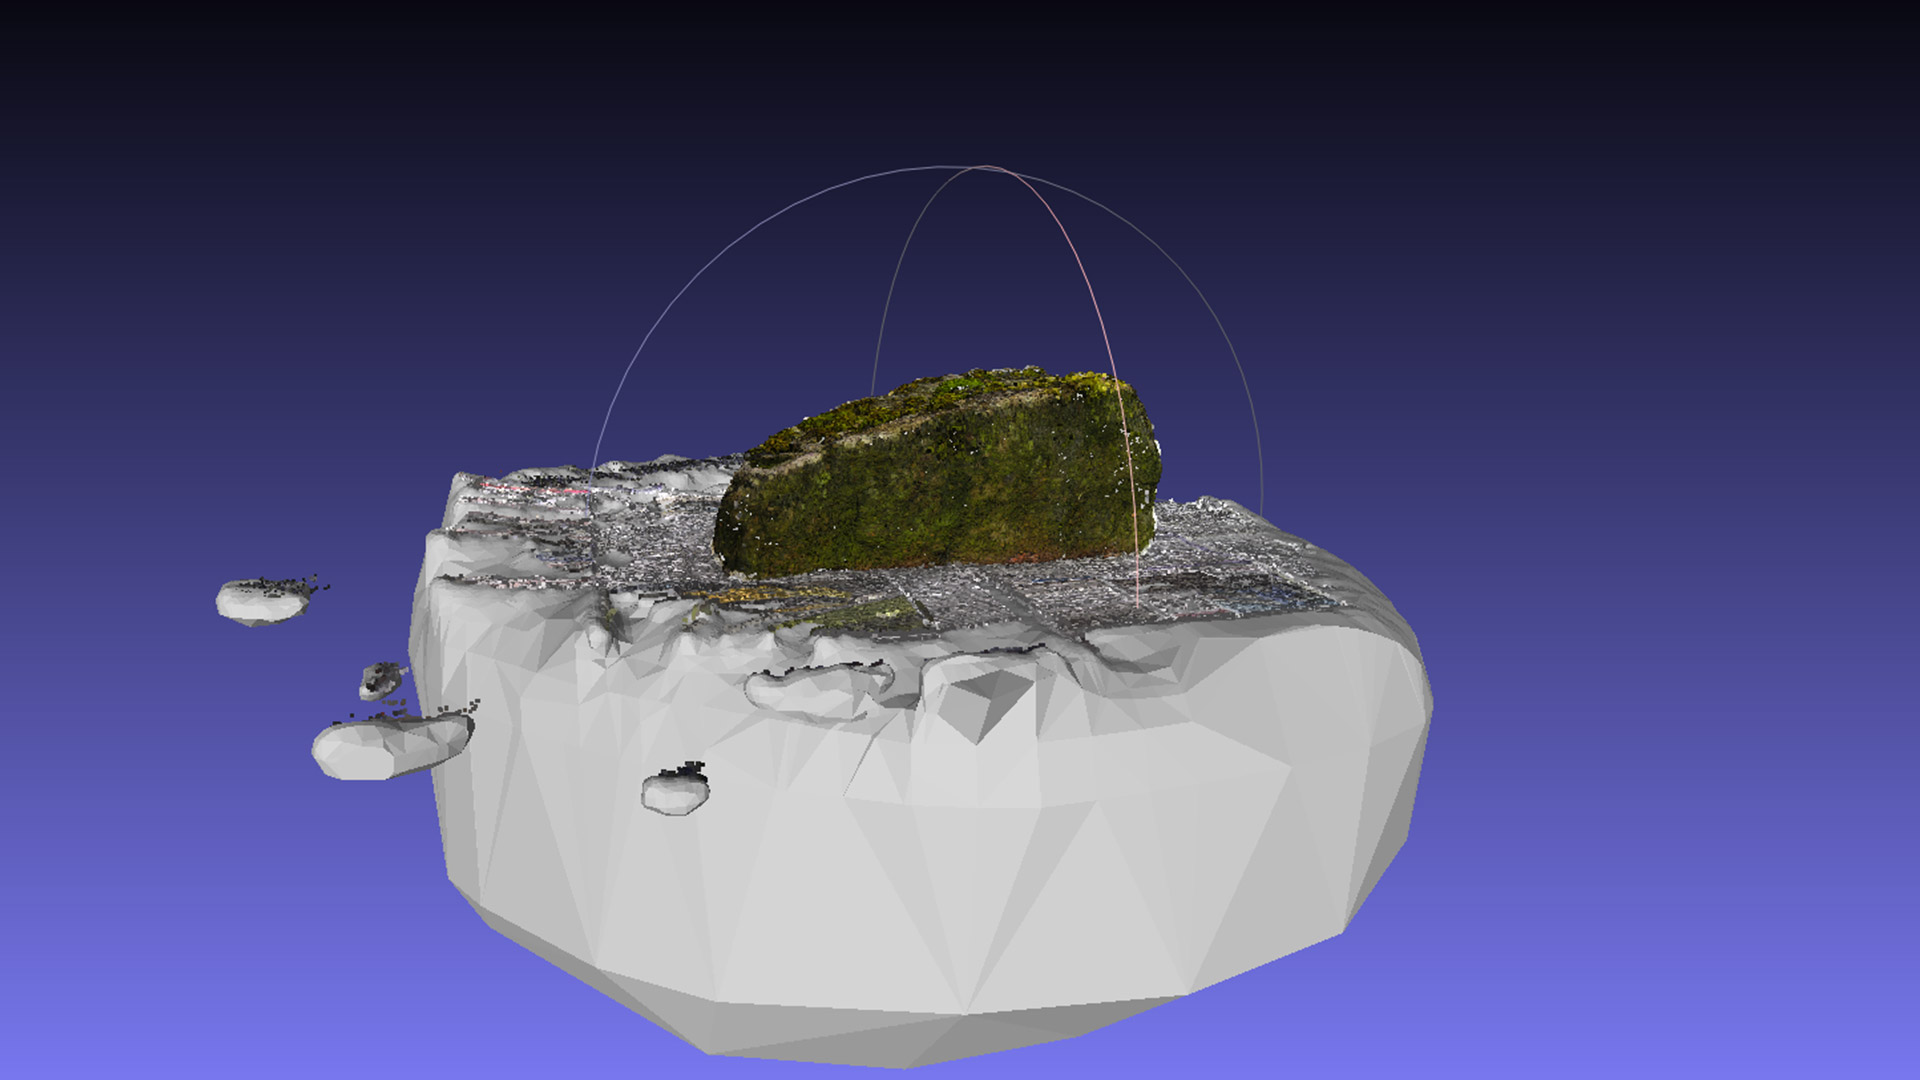
Mossy Stone – A comparison of the effect, that the used camera resolution has on the output model and its texture.
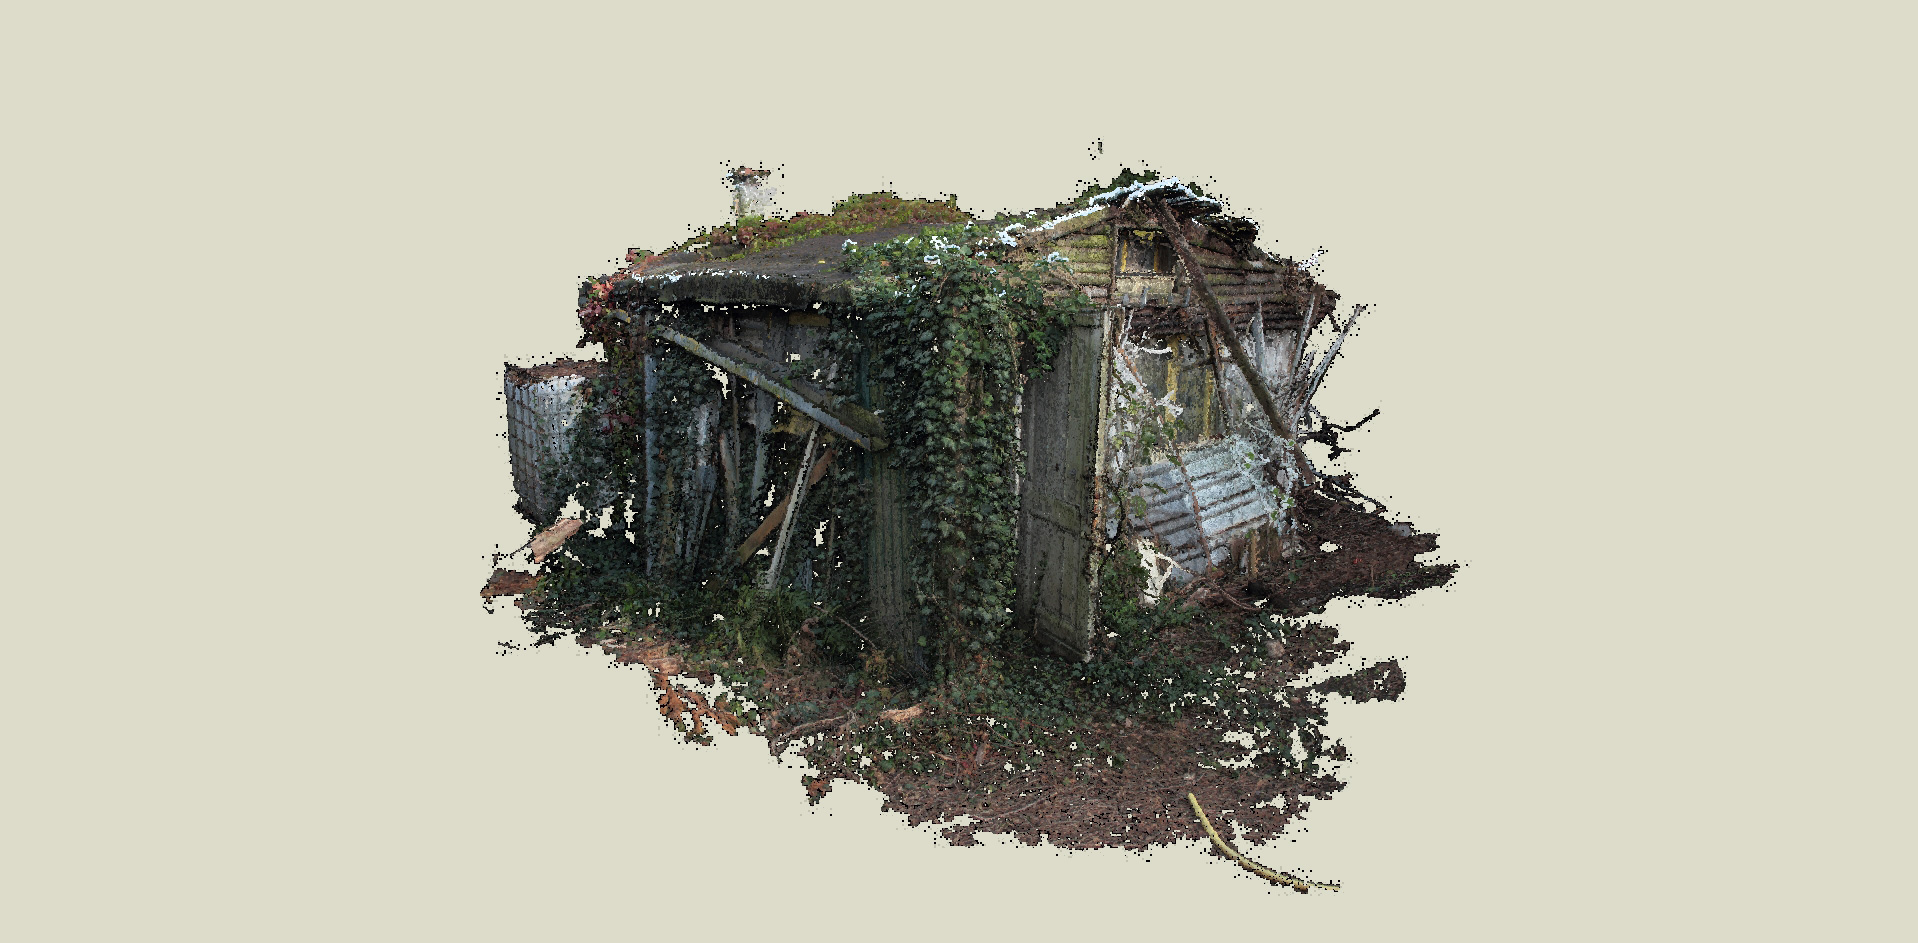
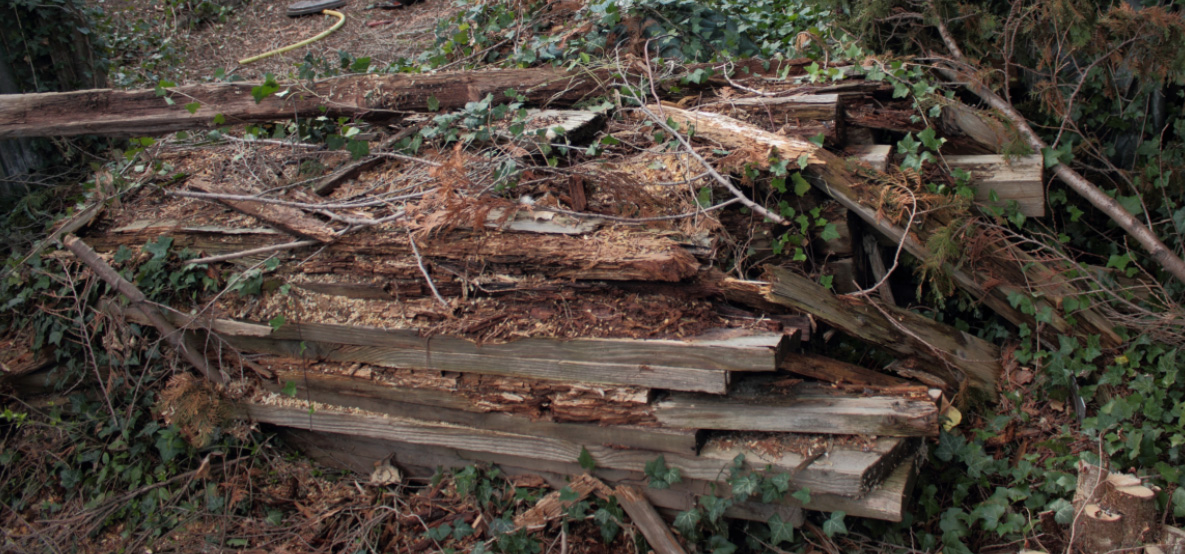
Woodwaste – Represents additional challenges, which arise if scanning a not moveable object outside.
Note: Additional use cases that I haven’t covered here, but I recommend people to look into if they are interested in photogrammetry. The scan of fully transparent objects like glasses, or the scan of room with interiors, or building facades.
A positive side effect of building the test projects is that their creation allows a basic comparison of the usability of both workflows in a production environment. As its generally not feasible to use a technique, even if it offers slightly better results if it’s too hard to use, or too time-consuming. Therefore, this is another important aspect, that should be taken into account for a recommendation.
Recommendations
The use of Photogrammetry offers a valid addition to a regular modeling workflow for projects, which:
Require objects with a lot of surface details and/or wear & tear, or weathering effects with a realistic appearance.
Don’t contain a lot of objects with reflective, or transparent parts.
Furthermore, it’s advisable to start with easier objects like the shown wooden log and some simple available equipment and then to gradually increase the difficulty of the objects to get a feel for the things, which might work, or don’t work. Before spending a lot of money on additional equipment.
For rough scans of normal props, a simple camera with 5-9 megapixels should be okay for an up-to-date game, but if close-up or hero models should be scanned in it's useful to have a few megapixels more to get some additional surface details into the scans. Moreover, the more control you have over your camera, the better. As the ability to manually focus the target object and the ability to adjust the ISO and other options make the capturing process way easier.
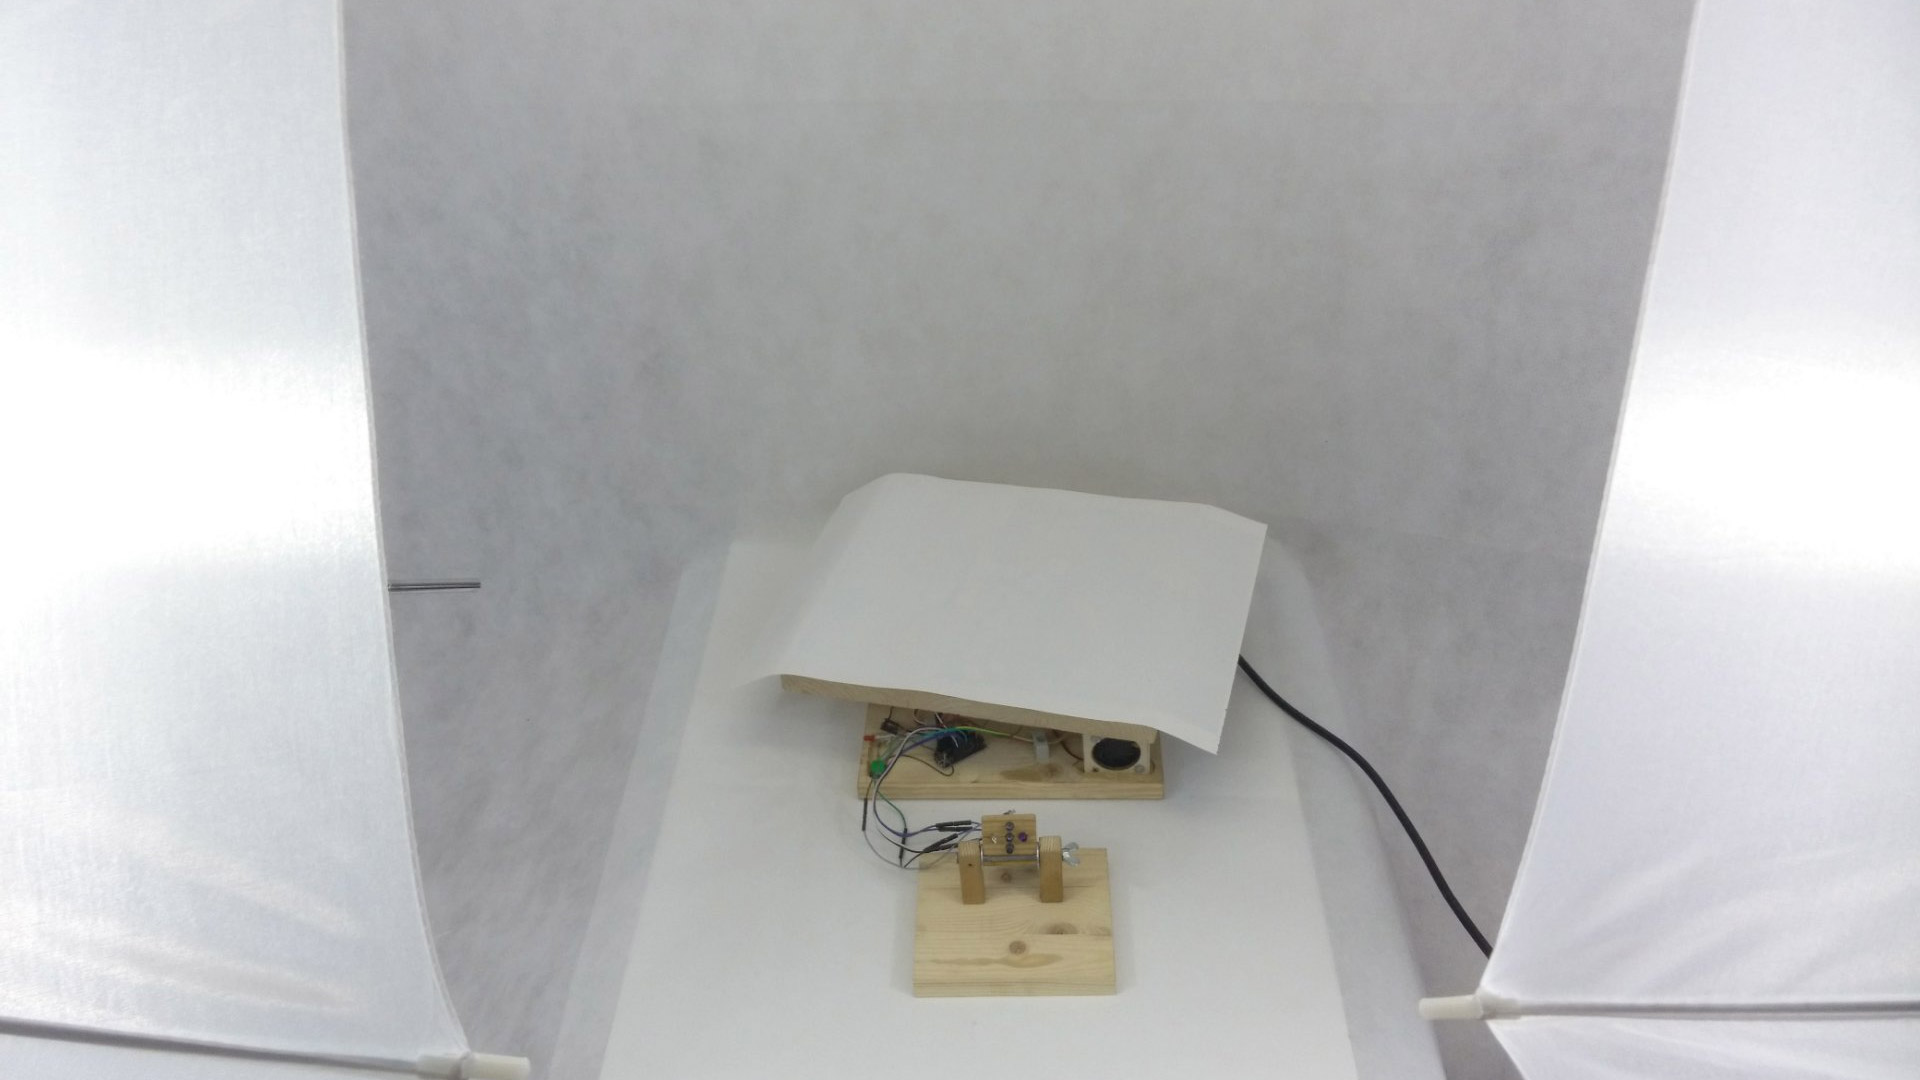
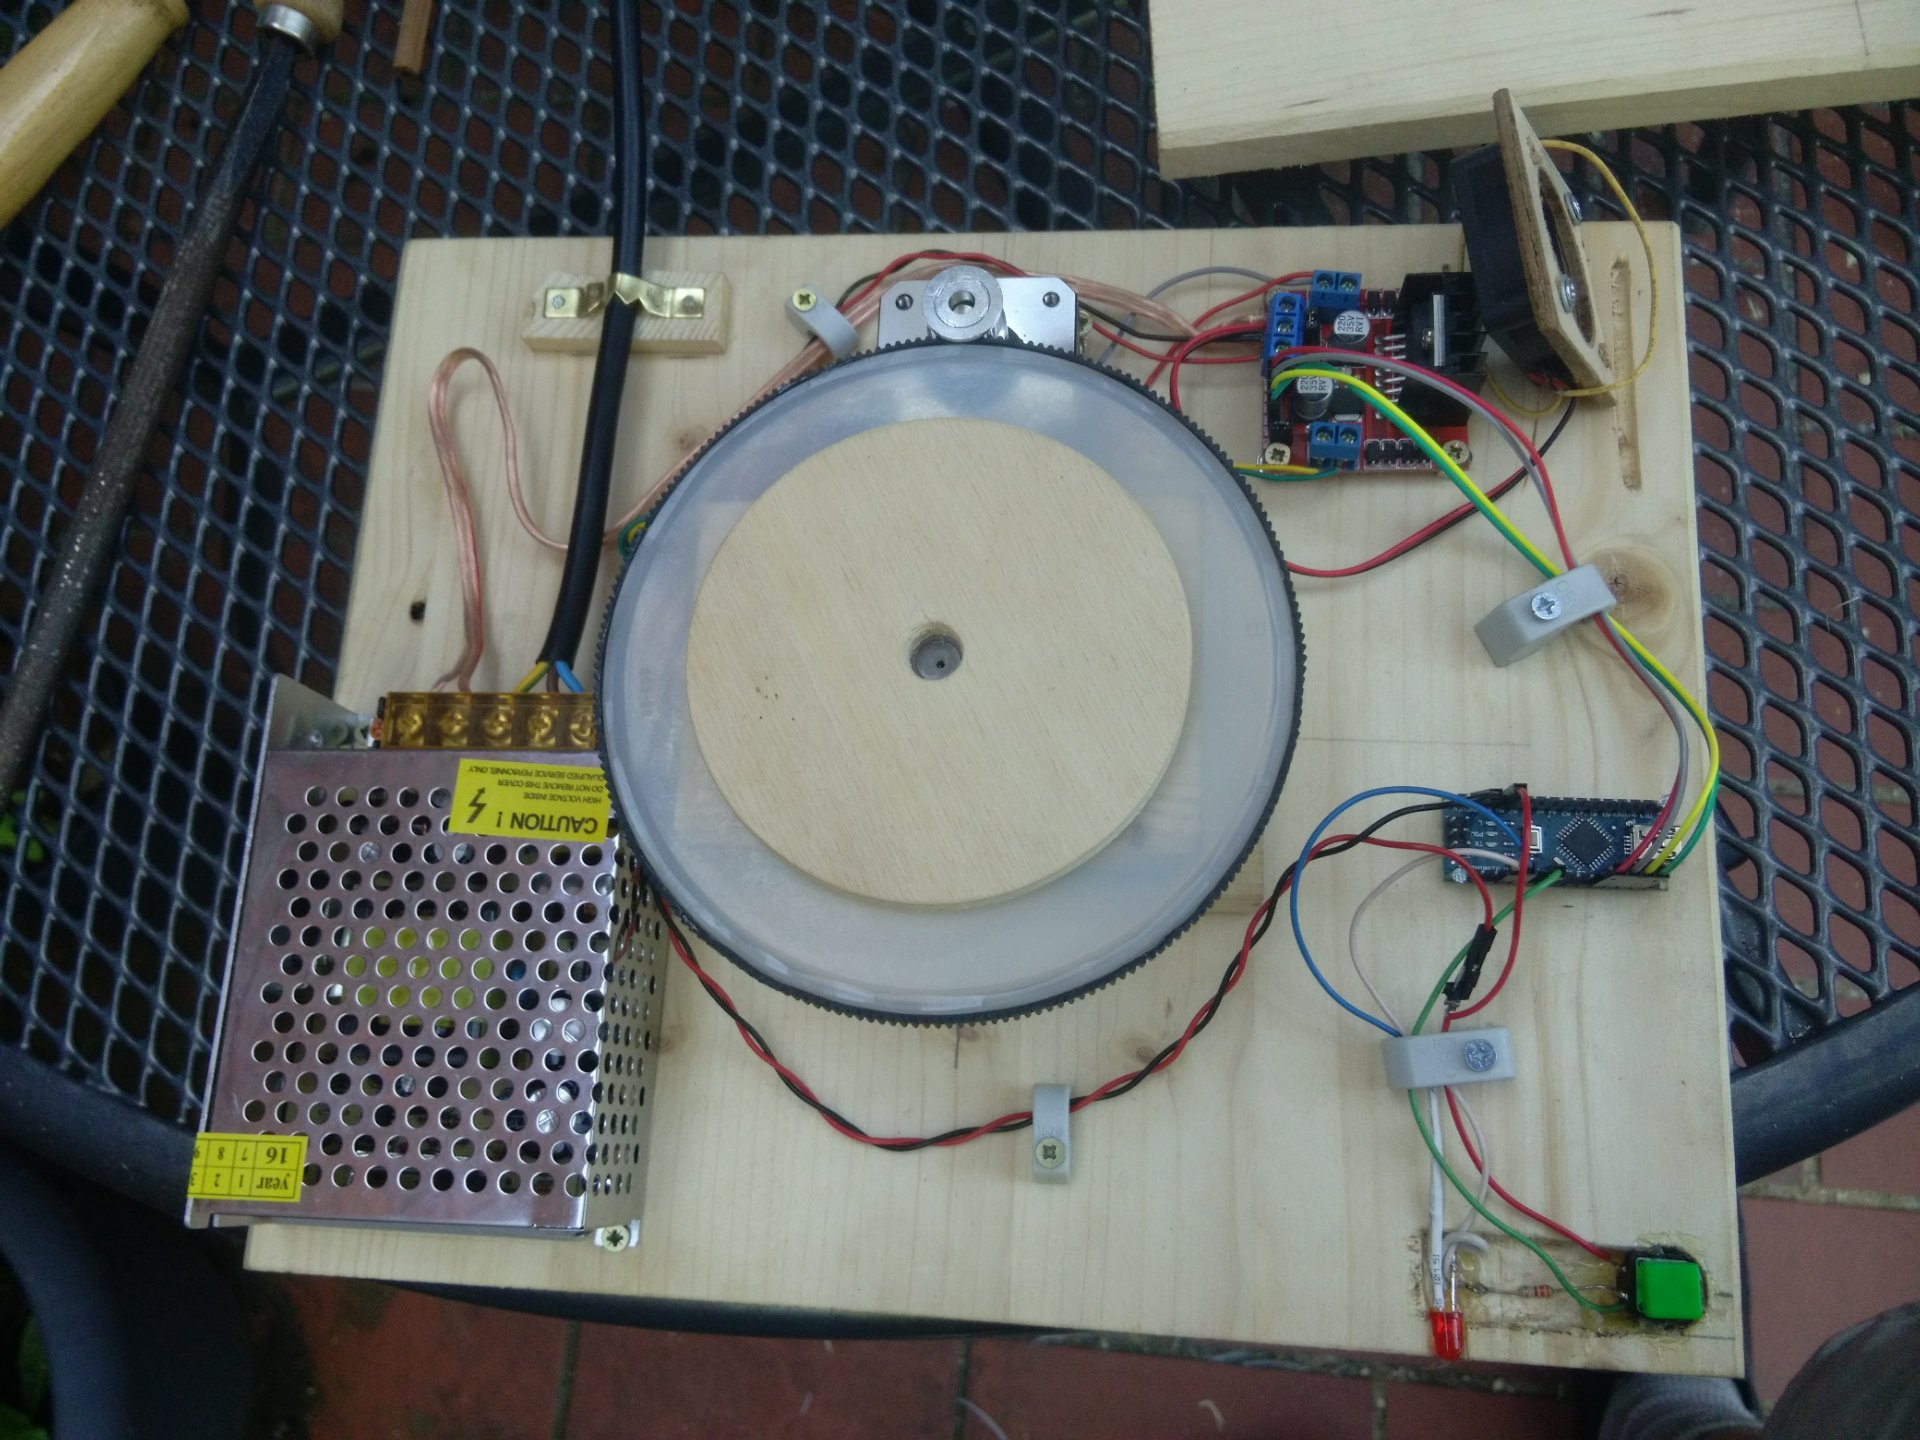
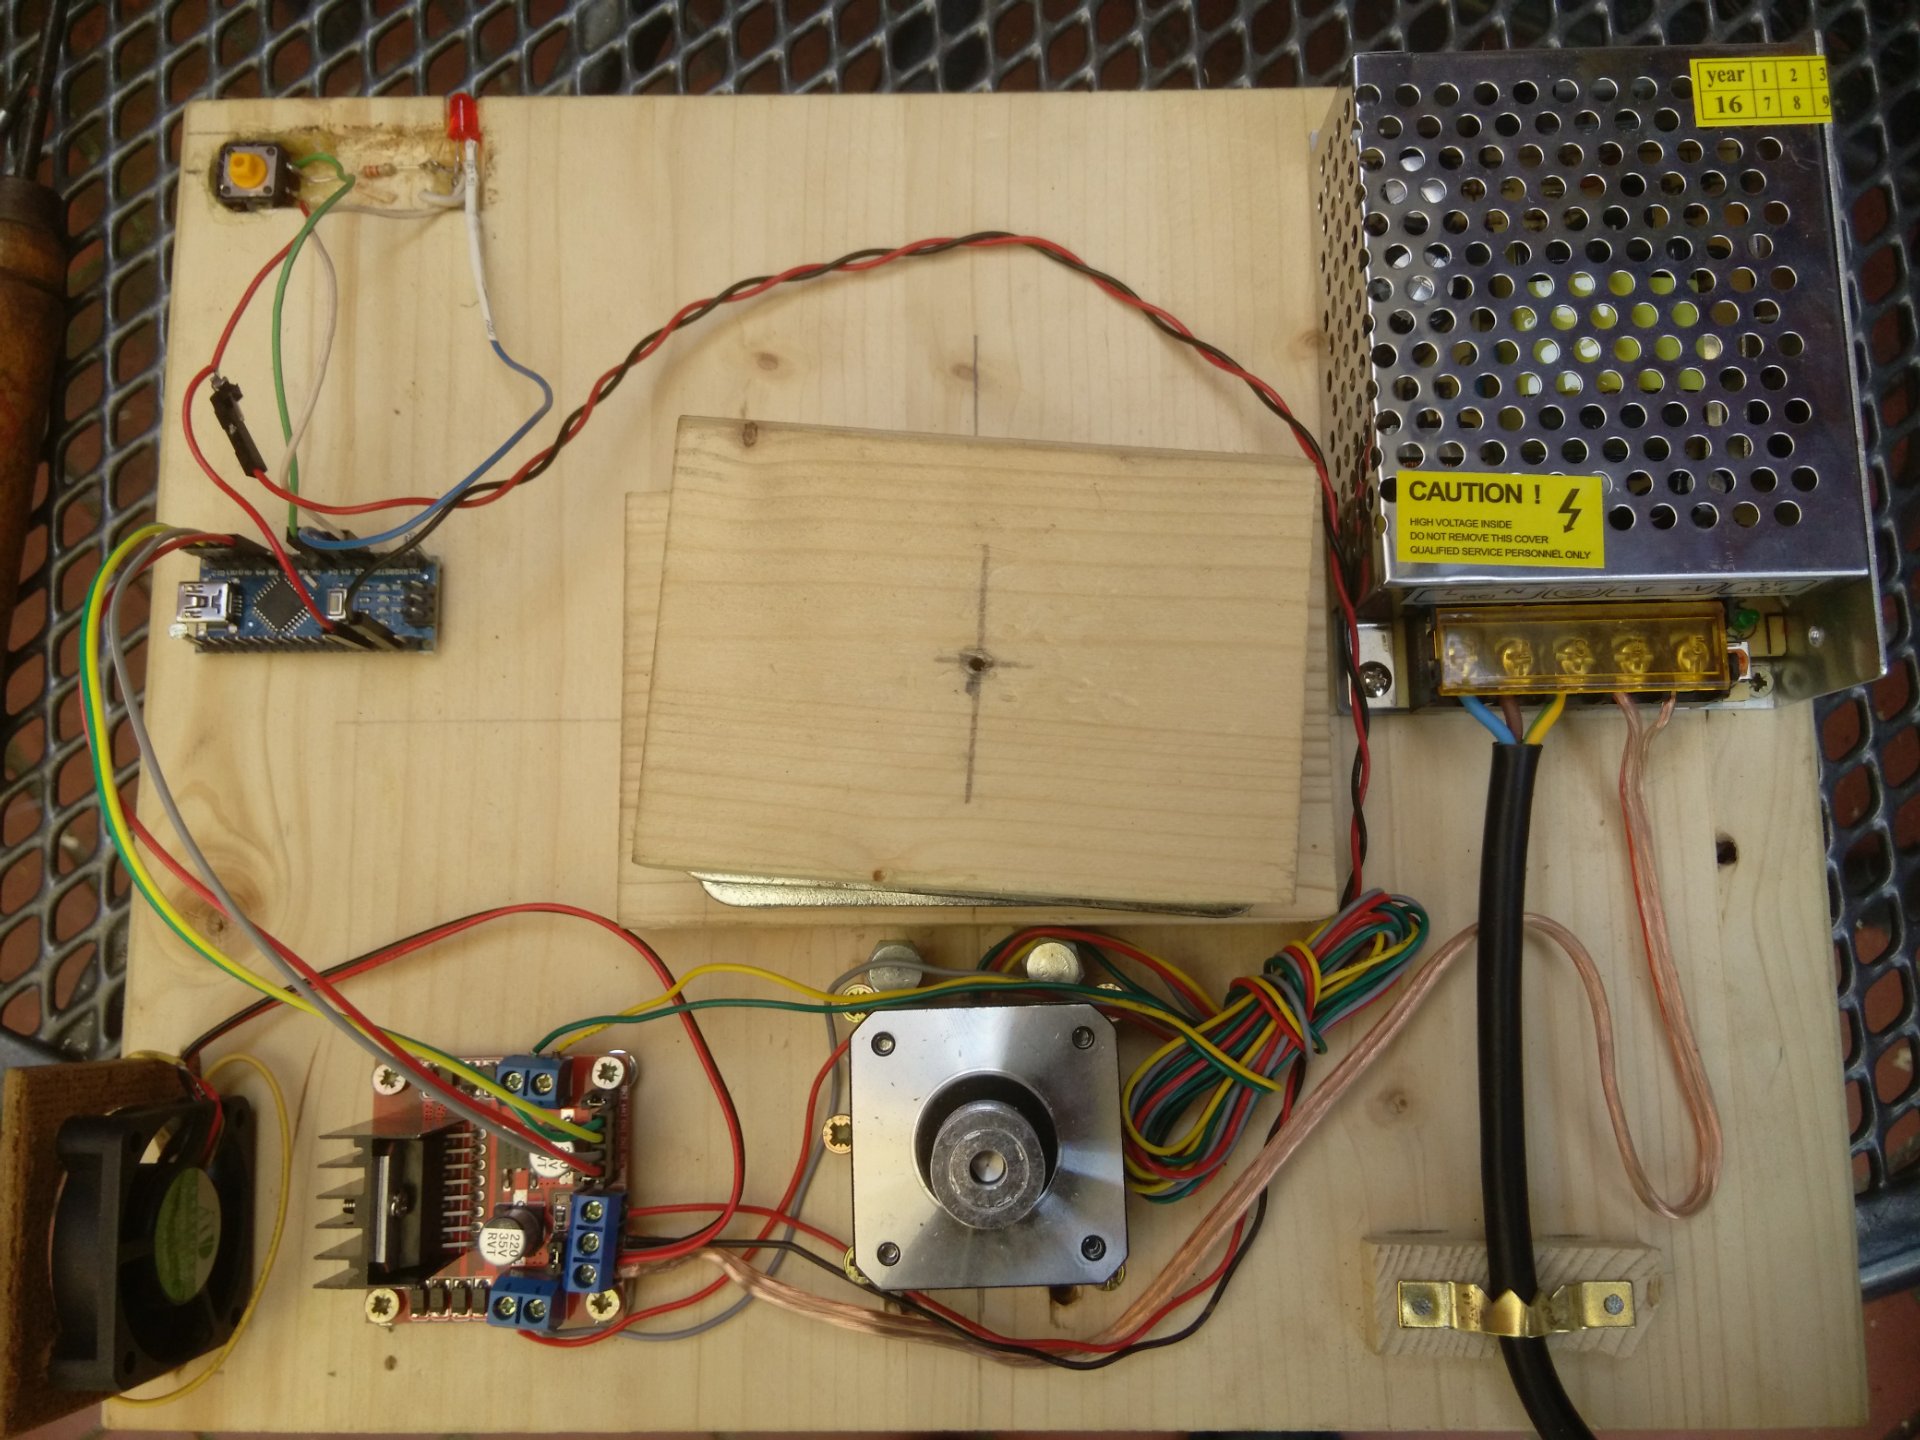
For scanning smaller moveable objects, a turntable is highly recommended, as it will greatly increase your capture speed. Furthermore, some studio lights will allow you to lit up your objects more evenly, so you can capture them regardless of the current lighting. In addition, a green screen will make your life a bit easier, as it allows you to cut off the background, which makes post-processing a lot easier. What is important, however, while using a turntable is that you don’t capture a lot of the static background. As the background would produce more matching points than your object on the turntable, which will result in a broken scan. A common trick is to put a piece of newspaper under the object so that bigger parts of your image are moving with the object. A slightly reflecting piece of paper works even better, as most photogrammetry applications cannot reproduce it so that you don’t have to cut it away afterward. Another good trick is to lift your object a bit with some kind of pillar, to capture the detail on the bottom of the object. Furthermore, it helps to avoid ambient occlusion on the lower part of the object.
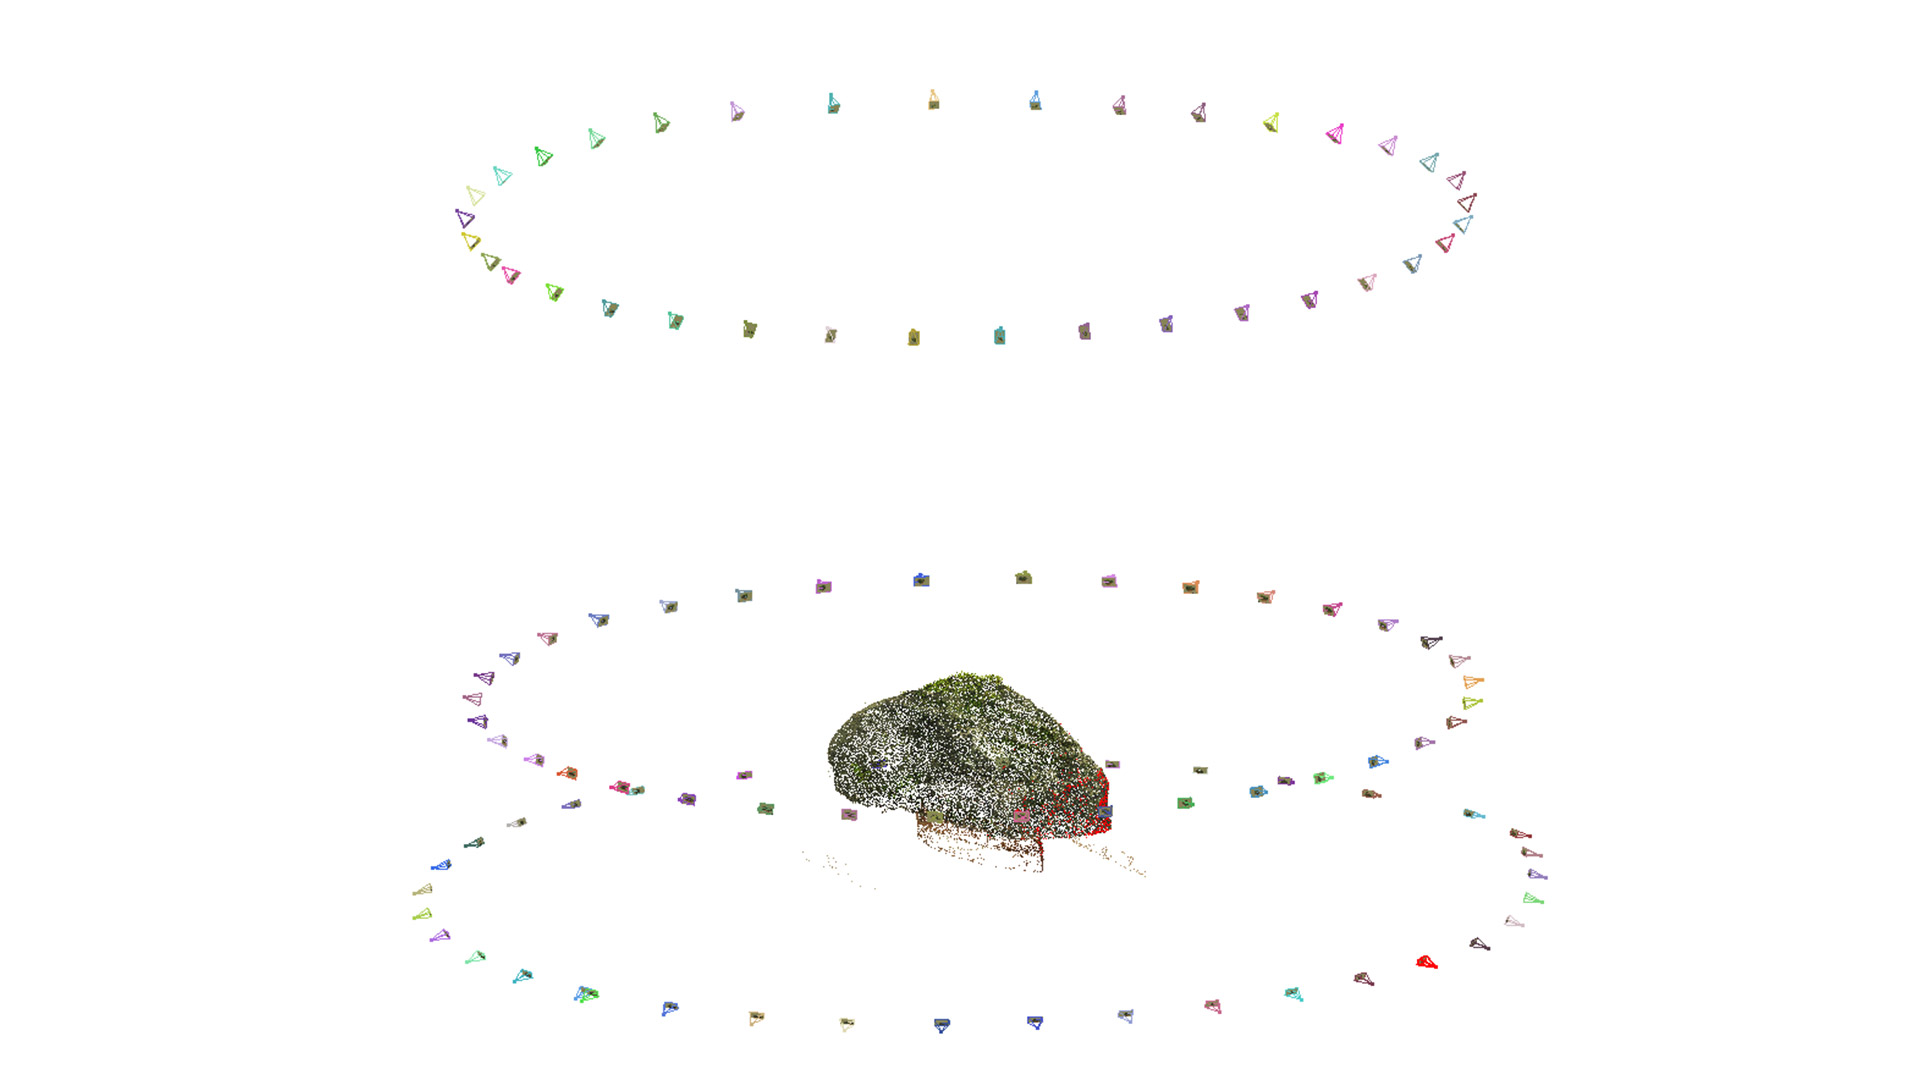
To get as much information into your scans as possible it's recommended to do three rows of image sequences of your object. Once from a high angle, once directly from the front, and once from a lower angle. Each row should contain a 360-degree sequence with images taken every 5 – 15 degrees depending on the complexity and desired amount of surface details
For capturing outdoor scenes, or objects it's quite important to plan in the weather and sun conditions on the planned scene, to avoid unnecessary breaks, or additional shooting days. Ideal is a cloudy day with defuse light. Furthermore, it’s advisable to shot always a couple more images, than you actually need, to have some angles in reserve for the case you miss some parts in the reconstruction days after the actual shooting. In addition, a single stick with an adjustable height is a great helper for capturing bigger objects from different heights, it also allows you to quicker capture sharp images, than with a tripod.